Users
Users
“User ” in the “Configuration” section is used by customer service representatives. Customer service representatives enter the names of their operators to support their customers in this field. If customers want help with anything, they will contact the operator who is active and does not have a job from the operators written here. Here you can create, edit, and delete users. You can read the article below for more information ??.
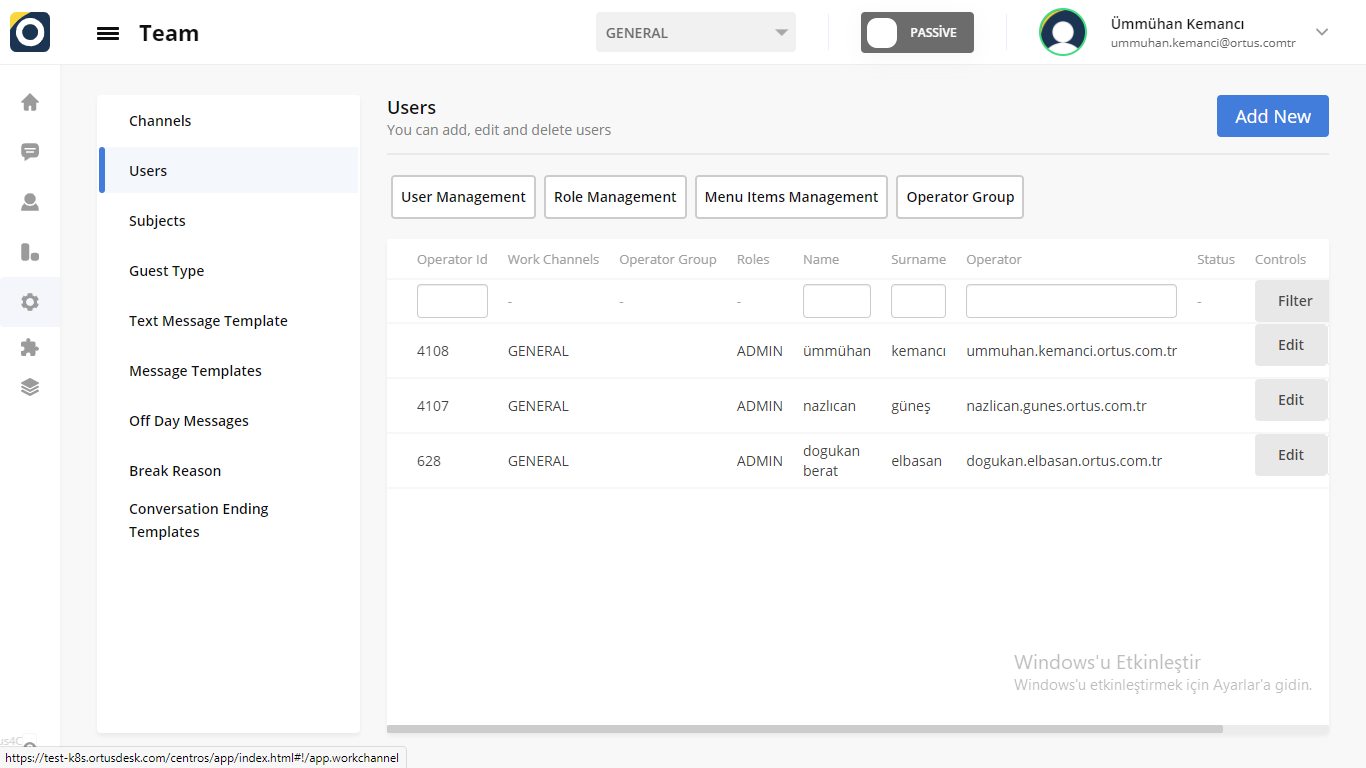
User Management
You can view your operators in user management and specify their role in the Edit button that appears when the page is scrolled to the right. In user roles, you can set user roles for your operators. In the menu item management section, you can view and change the menu management of the site. You can make any changes in the Edit and delete sections next to user names. You can also filter from the filter section.
Role Management
You can define roles for your users from the role management section. When determining your users or when you want to make adjustments to their roles, you can add these tags from the roles section and assign the role you want. Here we set it as admin, supervisor and agent to be an example for you. As can be seen from the example, when you design a user as supervisor, they will have more privileges. You can also make any changes you want.
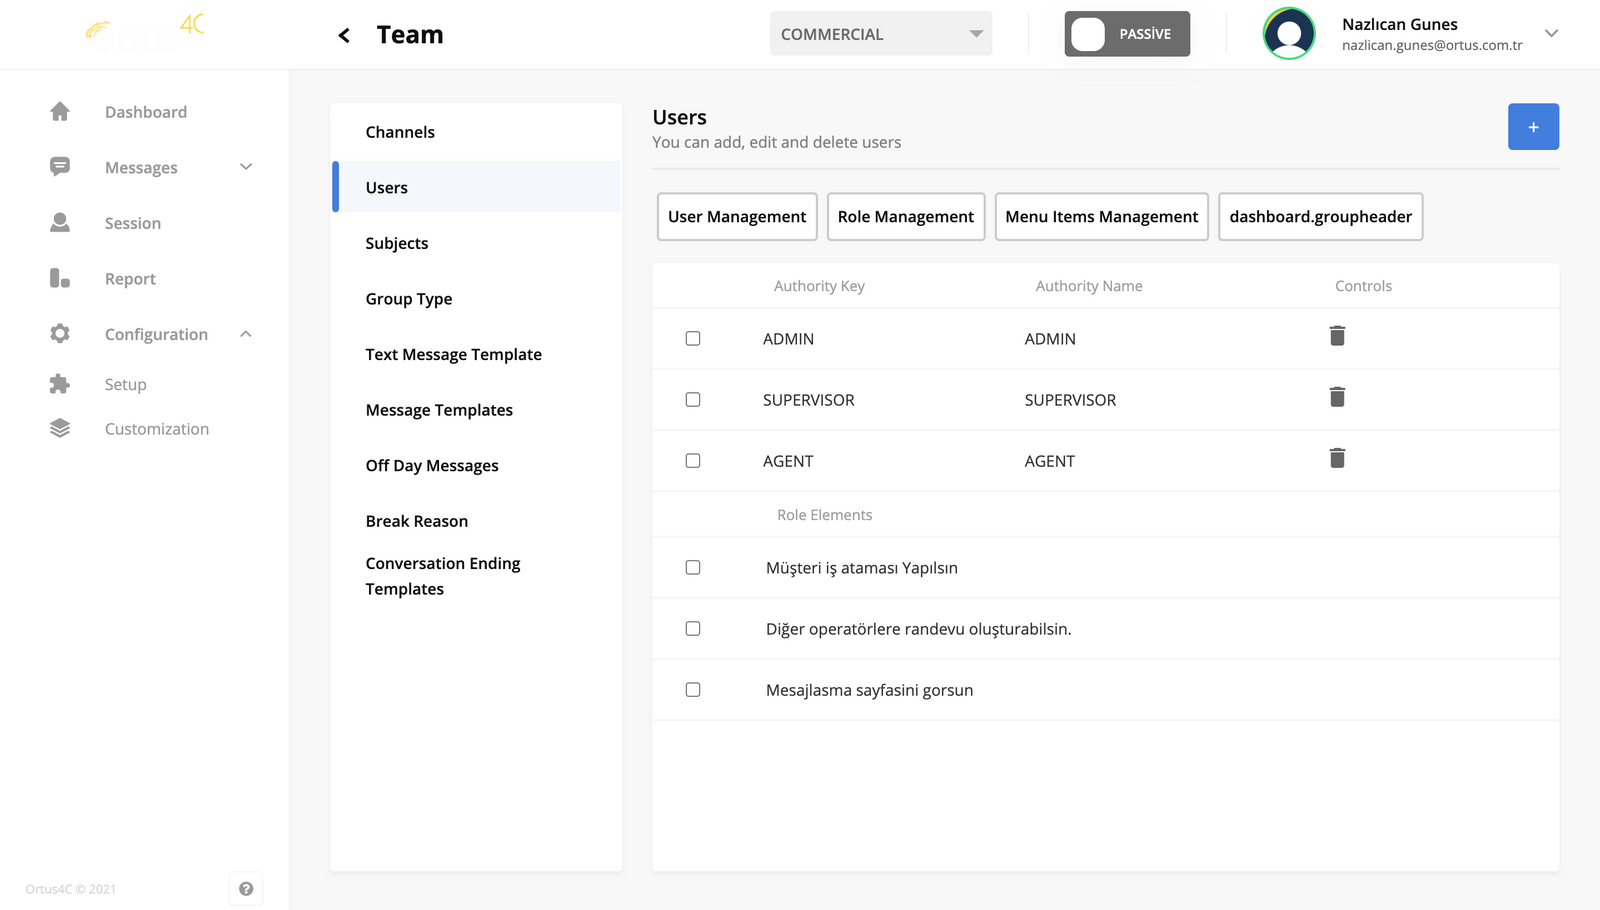

You can also view the roles you have specified in the role elements section. When you click on the roles (such as admin, supervisor, agent) that you have created in the elements section of this role, you will see what privileges they have.
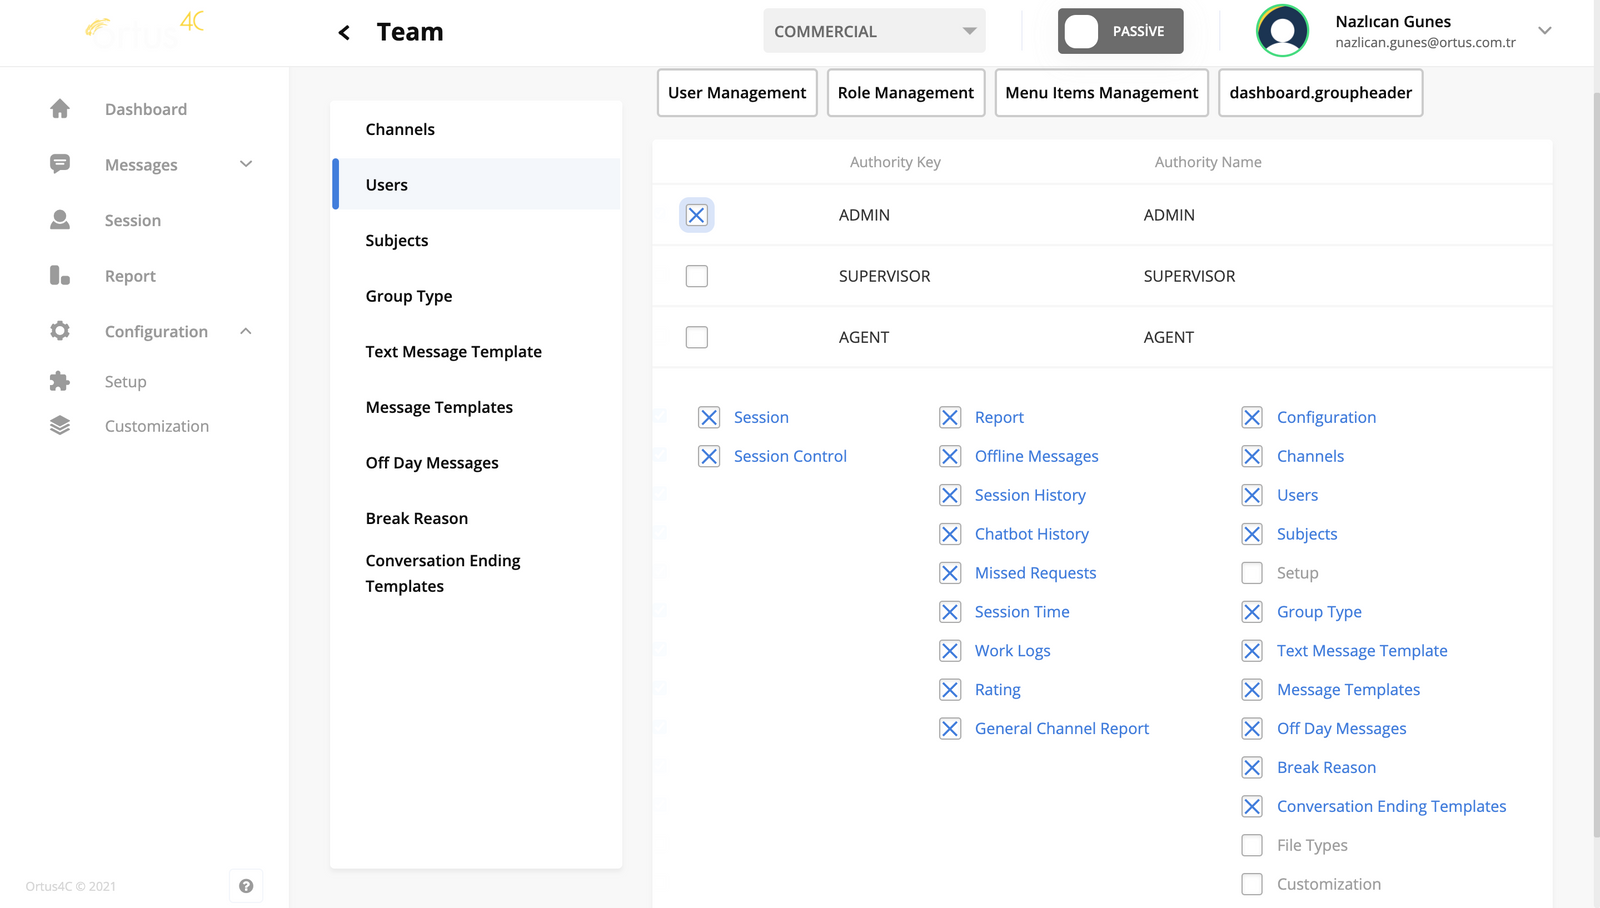
Menu Items Management
From the menu items section, you can determine and display which parts of the menu these users can access rather than their authorizations. I clicked on the admin to indicate in the example here, and here it is clearly visible which tabs he can access in the menu. You can define the authorizations of your users from here as you wish, add new authorizations or delete the existing ones.
Operator Group
From the operator group section, you can create groups that are specific to your operators.
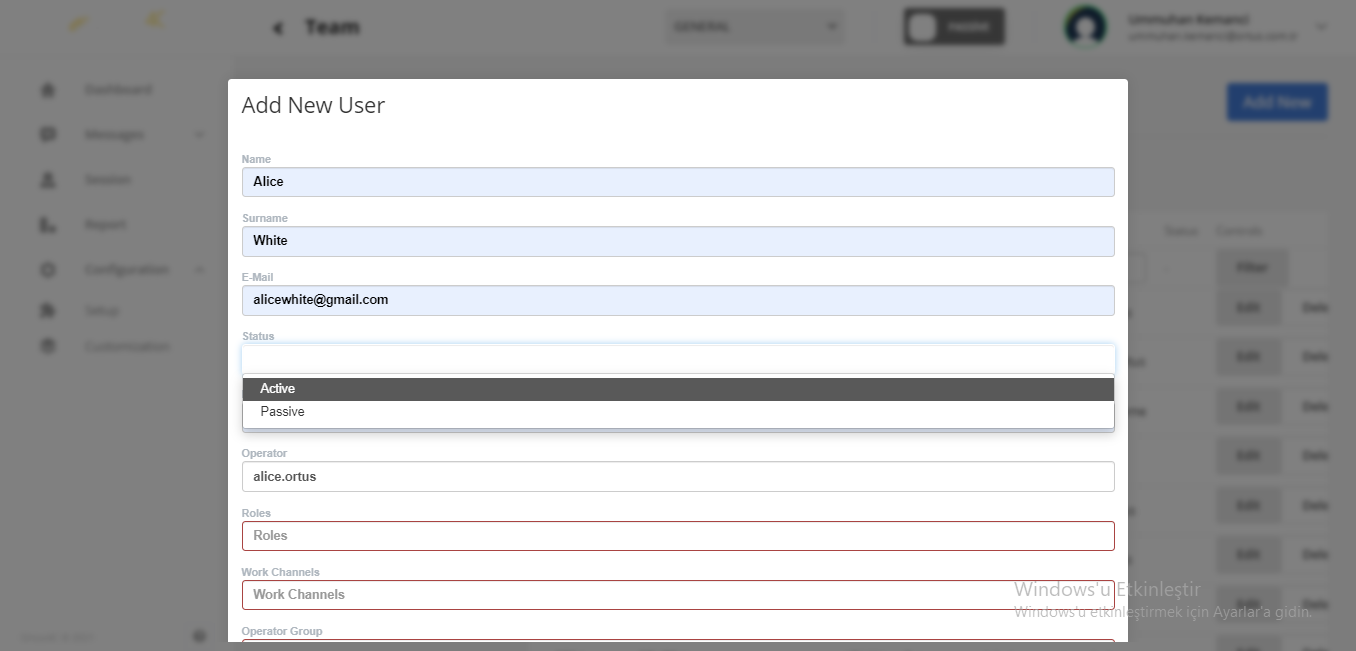
Add New to Users
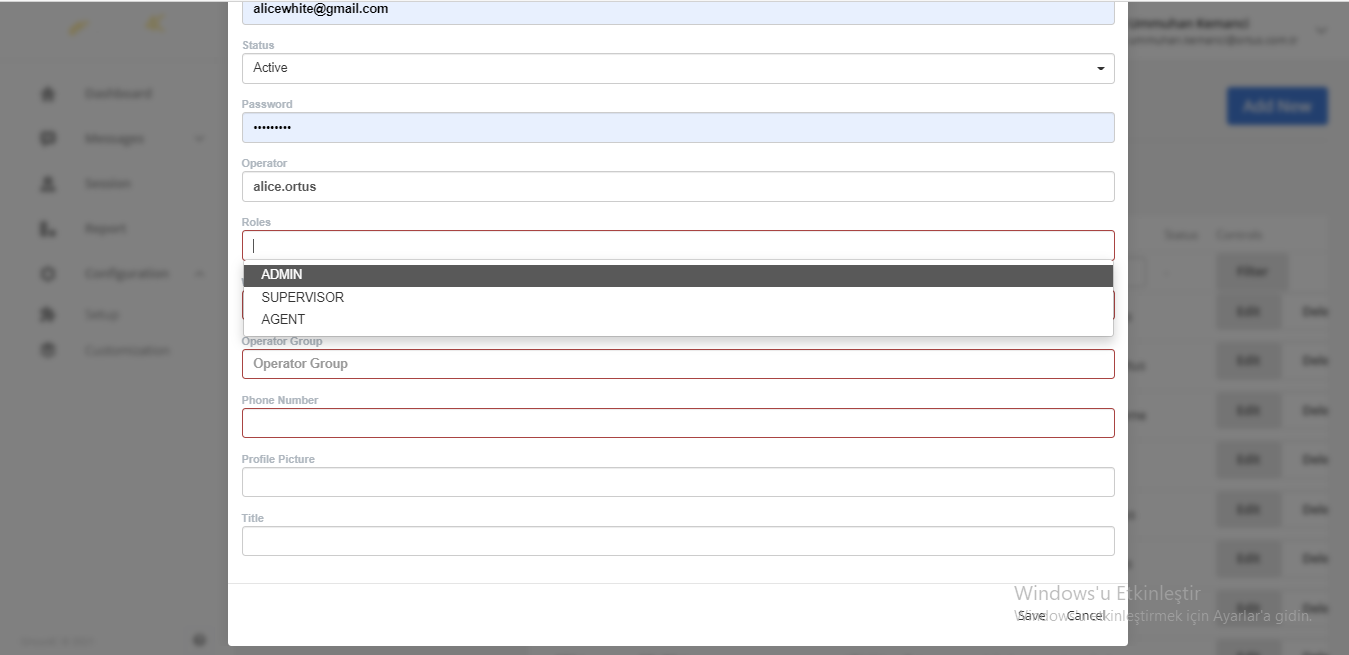
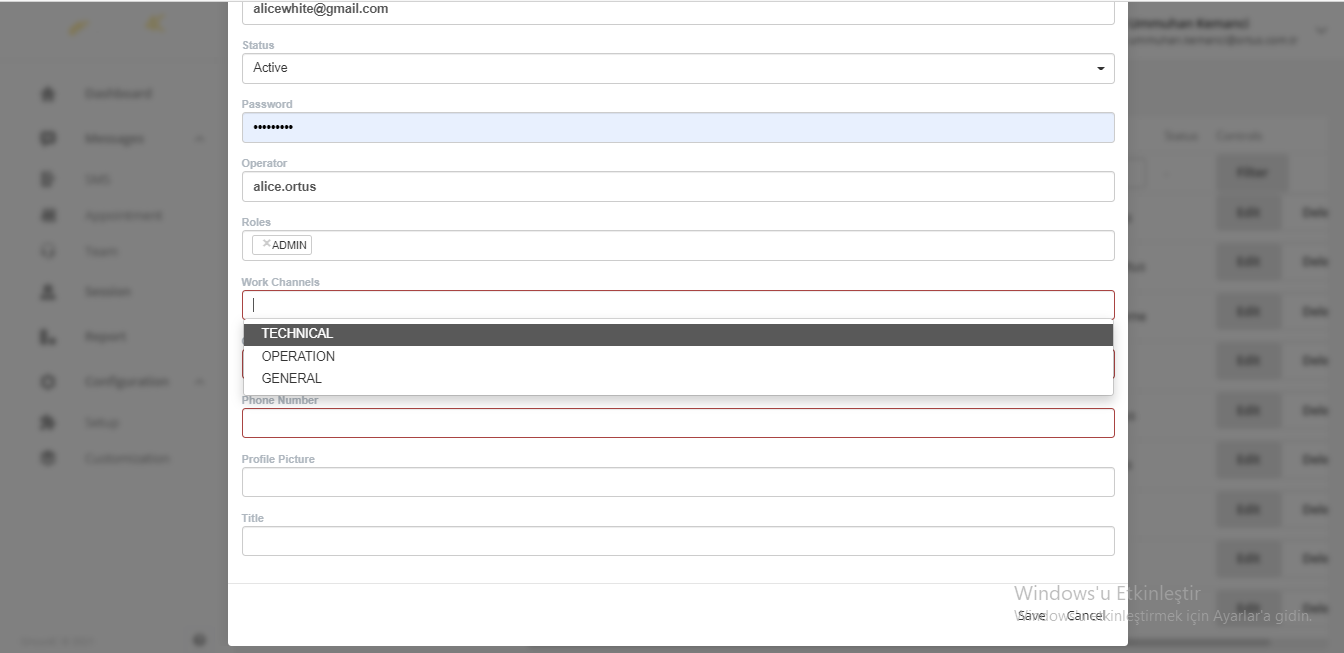
If you click the ”Add New” button, you will see this screen. If you enter name, surname, e-mail, status, dynamic password, operator, roles, work channles, operator group, phone number, Profile Picture and title information in the add new section, your templates will be ready. You can install it into the system by pressing the “reoland” key to save the changes. when the process of adding a new Massage Templates is complete, you will see the “process started” in the upper-right corner of the main screen. It’s Ready!

Edit to Users
You can use the “edit” option in the message column to edit your user. You will receive a warning to save changes on the home screen because you have added a new user. You can install it into the system by pressing the “reoland” key to save the changes. when the process of adding a new Massage Templates is complete, you will see the “process started” in the upper-right corner of the main screen. It’s Ready!
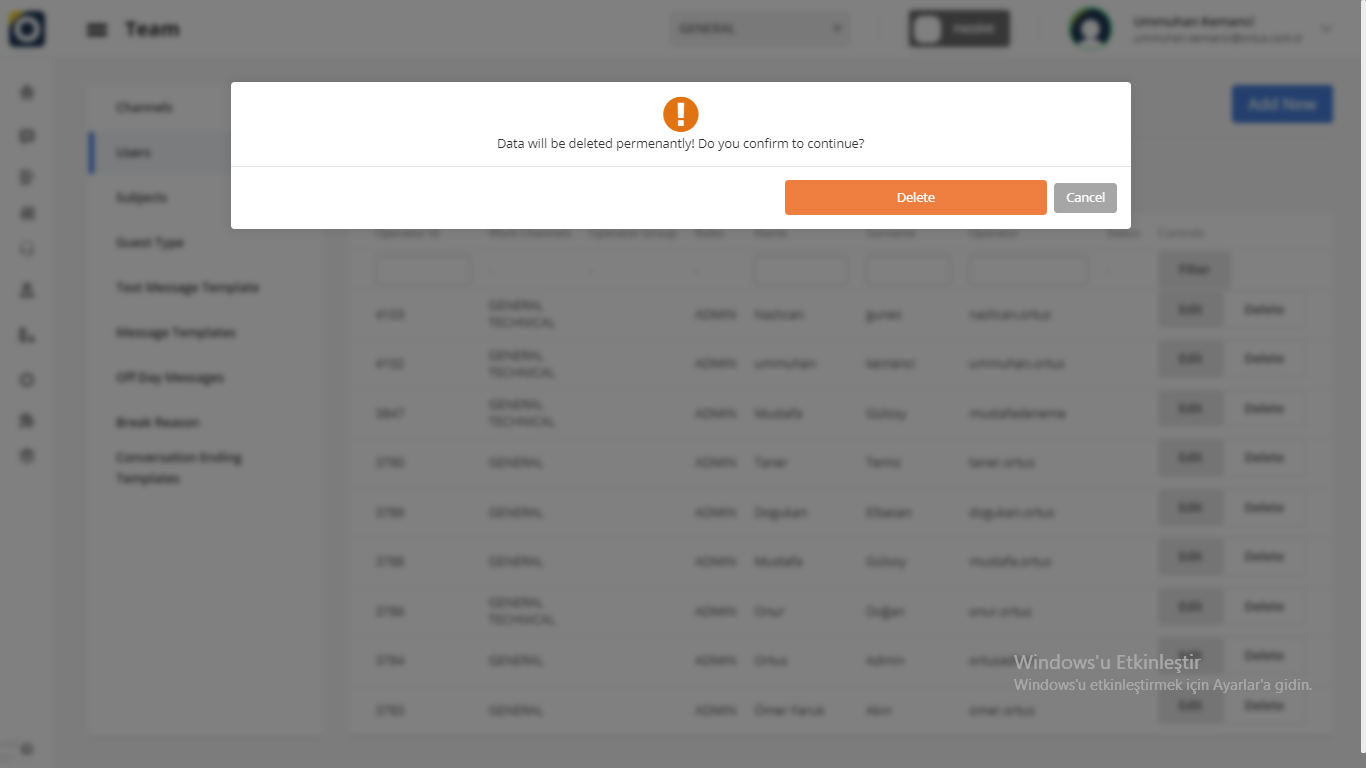
Delete to Users
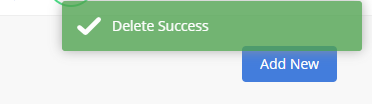
You can use the “delete” option to delete your user. When the deletion is complete, you will see the Delete Successful statement in the upper-right corner of the Home screen. It’s Ready!
That’s it!
Still need help? Message Us


