SMS

SMS

“SMS” in the “Handbook” section is for sending sms to your customers. You can customize your message with the options on the screen during sms sending. Your customers can initiate a written and video conversation with the link in the message sent to their phone. You can read the article below for more information. ??
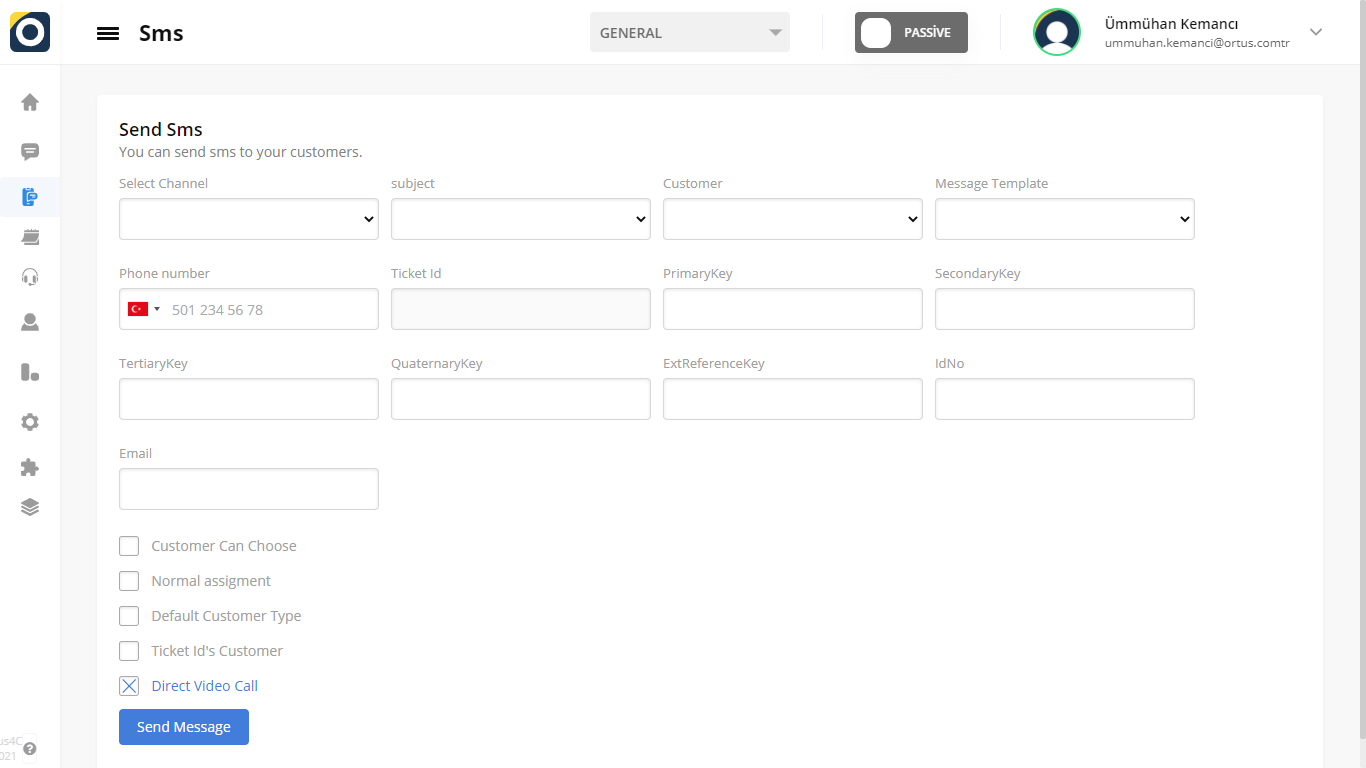
Select Channel

You can choose from which channel you want to send sms to your customer from the Select Channel section. You can also apply all these steps in the section that says subject and customer.

Subject

Subject is the short text that constitutes the content of the message (ex. password).

Customer

Customer determines the customer (ex. general or individual).

Message Template

As we have shown you before from the Message Template section, you can select the template related to the message template you will set from the settings section. The template you choose from here is the message template that will automatically go to your customer’s phone.

Phone Number

In order to send an SMS to your customer, you can enter the phone number of your customer in the Phone Number section.

Ticket ID

Ticket ID is the ticket number of the SMS sent.

E-Mail

You complete the step by entering contact information such as your customer’s name and e-mail in the Name and Mail section. Then when you click on the send message button, the sms will be sent.

You can also make any changes you want from the boxes under all contact information. Before sending the sms, you can make changes here and sms will be sent according to the changes you make.

Customer Can Choose

In the first button, the Customer Can Choose button, customers enter their own information. If you click this button and activate it, you don’t need to enter the contact information you will enter here. Customers enter their own information. So, you only have to command the message to be sent automatically.

Normal Assignment

If you activate the normal assignment button, customers who are normally assigned directly from the system are assigned to the operators differently this time. When you mark this button, customers are put in the pool and queued. so when it’s their turn and whichever operator is available for that moment, that operator talks to the customer.

Default Customer Type

This is where you can select your default customer type.

Direct Video Call

If you activate this button, the simultaneous video call will start when the sms is gone.

Primary Key, Secondary Key, Tertiary Key, Quaternary Key, Ext Reference Key

You can use these fields to get different information other than the information we have determined for the contact information of the customers. So you can make customizations as you wish.

ID No

The customer’s id number is entered here.

As you can see above, you can send sms to your customers by filling in the necessary information. In this way, your customers can use the link found in SMS when contacting you.

That’s it!

Still need help? Message Us

SMS

“El Kitabı bölümünde yer alan “SMS” müşterilerinize sms göndermek içindir. Sms gönderimi sırasında ekranda yer alan seçenekler ile mesajınızı özelleştirebilirsiniz. Müşterileriniz telefonlarına gönderilen mesajdaki link ile yazılı ve görüntülü konuşma başlatabilirler. Daha fazla bilgi için aşağıdaki yazıyı okuyabilirsiniz. ??

Kanal Seçin

Kanal Seç bölümünden müşterinize hangi kanaldan sms göndermek istediğinizi seçebilirsiniz. Tüm bu adımları konu ve müşteri yazan kısımda da uygulayabilirsiniz.

Konu

Konu, mesajın içeriğini oluşturan kısa metindir (örn. şifre).

Müşteri

Müşteri, müşteriyi belirler (örn. genel veya bireysel).

Mesaj Şablonu

Mesaj Şablonu bölümünden size daha önce gösterdiğimiz gibi ayarlar bölümünden belirleyeceğiniz mesaj şablonu ile ilgili şablonu seçebilirsiniz. Buradan seçeceğiniz şablon müşterinizin telefonuna otomatik olarak gidecek olan mesaj şablonudur.

Telefon Numarası

Müşterinize SMS göndermek için Telefon Numarası bölümüne müşterinizin telefon numarasını girebilirsiniz.

Bilet Kimliği

Bilet Kimliği, gönderilen SMS’in bilet numarasıdır.

E-Posta

İsim ve Mail bölümüne müşterinizin ismi ve maili gibi iletişim bilgilerini girerek adımı tamamlıyorsunuz. Daha sonra mesaj gönder butonuna tıkladığınızda sms gönderilmiş olacaktır.

Ayrıca tüm iletişim bilgilerinin altındaki kutucuklardan istediğiniz değişiklikleri yapabilirsiniz. Sms göndermeden önce buradan değişiklik yapabilirsiniz ve yaptığınız değişikliklere göre sms gönderilecektir.

Müşteri Seçebilir

İlk buton olan Müşteri Seçebilir butonunda müşteriler kendi bilgilerini girerler. Bu butona tıklayıp aktif hale getirirseniz buraya gireceğiniz iletişim bilgilerini girmenize gerek kalmaz. Müşteriler kendi bilgilerini girerler. Böylece size sadece mesajın otomatik olarak gönderilmesi komutunu vermek kalır.

Normal Görevlendirme

Normal atama butonunu aktif hale getirirseniz normalde sistemden direkt atanan müşteriler bu sefer farklı olarak operatörlere atanır. Bu butonu işaretlediğinizde müşteriler havuza alınır ve sıraya konulur. Böylece sıra kendilerine geldiğinde ve o an için hangi operatör müsaitse müşteriyle o operatör konuşur.

Varsayılan Müşteri Tipi

Buradan varsayılan müşteri tipinizi seçebilirsiniz.

Doğrudan Görüntülü Arama

Bu düğmeyi etkinleştirirseniz, sms gittiğinde eşzamanlı görüntülü arama başlayacaktır.

Birincil Anahtar, İkincil Anahtar, Üçüncül Anahtar, Dördüncül Anahtar, Dış Referans Anahtarı

Bu alanları müşterilerin iletişim bilgileri için belirlediğimiz bilgiler dışında farklı bilgiler almak için de kullanabilirsiniz. Böylece dilediğiniz gibi özelleştirmeler yapabilirsiniz.

Kimlik No

Müşterinin kimlik numarası buraya girilir.

Yukarıda gördüğünüz gibi gerekli bilgileri doldurarak müşterilerinize sms gönderebilirsiniz. Bu sayede müşterileriniz sizinle iletişime geçerken SMS içerisinde bulunan linki kullanabilirler.

Bu kadar!

Hala yardıma ihtiyacınız var mı? Bize Mesaj Gönderin