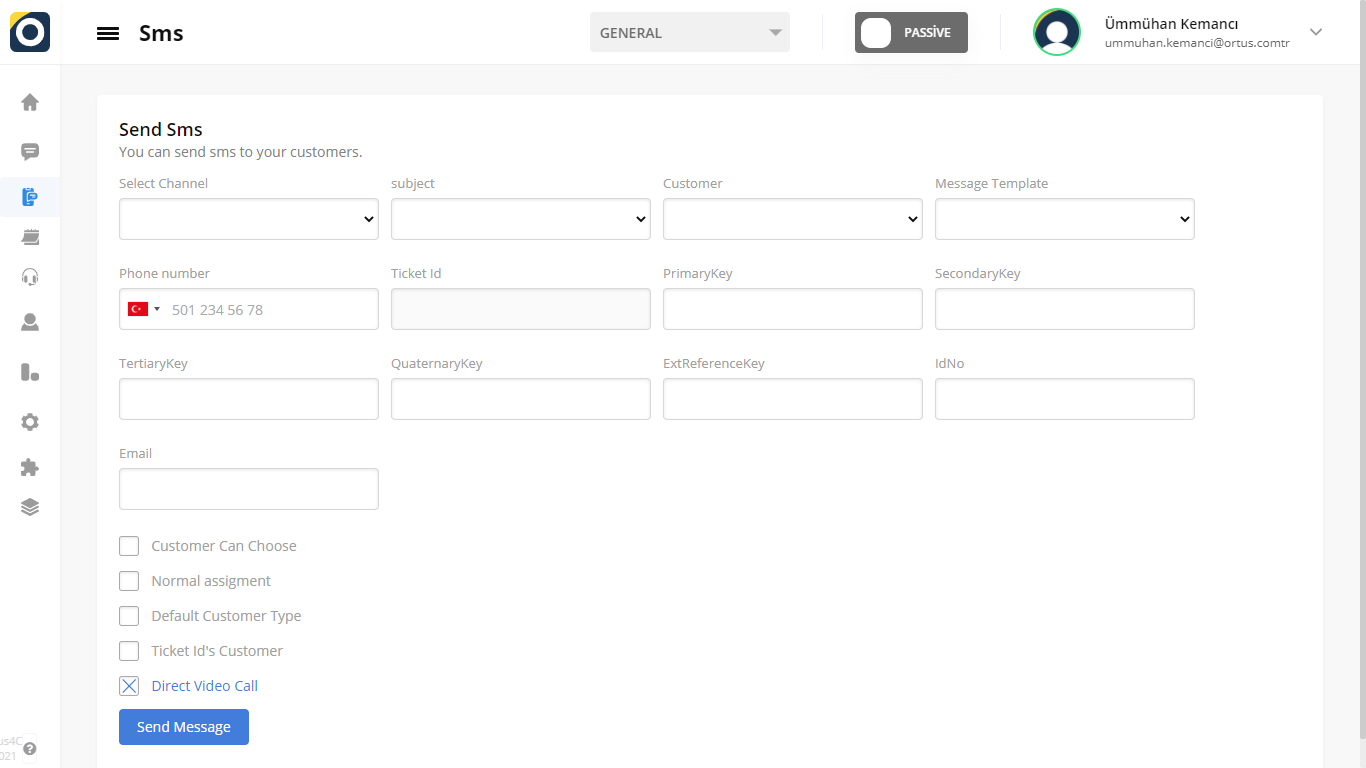
“El Kitabı” bölümünde yer alan “SMS” müşterilerinize sms göndermek içindir.
Sms gönderimi sırasında ekranda yer alan seçenekler ile mesajınızı özelleştirebilirsiniz.
Müşterileriniz telefonlarına gönderilen mesajdaki link ile yazılı ve görüntülü konuşma başlatabilirler. Daha fazla bilgi için aşağıdaki yazıyı okuyabilirsiniz. ??
Kanal Seçin
Kanal Seç bölümünden müşterinize hangi kanaldan sms göndermek istediğinizi seçebilirsiniz.
Tüm bu adımları konu ve müşteri yazan kısımda da uygulayabilirsiniz.
Konu
Konu, mesajın içeriğini oluşturan kısa metindir (örn. şifre).
Müşteri
Müşteri, müşteriyi belirler (örn. genel veya bireysel).
Mesaj Şablonu
Mesaj Şablonu bölümünden size daha önce gösterdiğimiz gibi ayarlar bölümünden belirleyeceğiniz mesaj şablonu ile ilgili şablonu seçebilirsiniz.
Buradan seçeceğiniz şablon müşterinizin telefonuna otomatik olarak gidecek olan mesaj şablonudur.
Telefon Numarası
Müşterinize SMS göndermek için Telefon Numarası bölümüne müşterinizin telefon numarasını girebilirsiniz.
İsim ve Mail bölümüne müşterinizin ismi ve maili gibi iletişim bilgilerini girerek adımı tamamlıyorsunuz.
Daha sonra mesaj gönder butonuna tıkladığınızda sms gönderilmiş olacaktır.
Ayrıca tüm iletişim bilgilerinin altındaki kutucuklardan istediğiniz değişiklikleri yapabilirsiniz.
Sms göndermeden önce buradan değişiklik yapabilirsiniz ve yaptığınız değişikliklere göre sms gönderilecektir.
Müşteri Seçebilir
İlk buton olan Müşteri Seçebilir butonunda müşteriler kendi bilgilerini girerler.
Bu butona tıklayıp aktif hale getirirseniz buraya gireceğiniz iletişim bilgilerini girmenize gerek kalmaz.
Müşteriler kendi bilgilerini girerler.
Böylece size sadece mesajın otomatik olarak gönderilmesi komutunu vermek kalır.
Normal Görevlendirme
Normal atama butonunu aktif hale getirirseniz normalde sistemden direkt atanan müşteriler bu sefer farklı olarak operatörlere atanır.
Bu butonu işaretlediğinizde müşteriler havuza alınır ve sıraya konulur.
Böylece sıra kendilerine geldiğinde ve o an için hangi operatör müsaitse müşteriyle o operatör konuşur.
Varsayılan Müşteri Tipi
Buradan varsayılan müşteri tipinizi seçebilirsiniz.
Doğrudan Görüntülü Arama
Bu düğmeyi etkinleştirirseniz, sms gittiğinde eşzamanlı görüntülü arama başlayacaktır.
Bu alanları müşterilerin iletişim bilgileri için belirlediğimiz bilgiler dışında farklı bilgiler almak için de kullanabilirsiniz.
Böylece dilediğiniz gibi özelleştirmeler yapabilirsiniz.
Kimlik No
Müşterinin kimlik numarası buraya girilir.
Yukarıda gördüğünüz gibi gerekli bilgileri doldurarak müşterilerinize sms gönderebilirsiniz.
Bu sayede müşterileriniz sizinle iletişime geçerken SMS içerisinde bulunan linki kullanabilirler.
“SMS” in the “Handbook” section is for sending sms to your customers. You can customize your message with the options on the screen during sms sending. Your customers can initiate a written and video conversation with the link in the message sent to their phone. You can read the article below for more information. ??
Select Channel
You can choose from which channel you want to send sms to your customer from the Select Channel section. You can also apply all these steps in the section that says subject and customer.
Subject
Subject is the short text that constitutes the content of the message (ex. password).
Customer
Customer determines the customer (ex. general or individual).
Message Template
As we have shown you before from the Message Template section, you can select the template related to the message template you will set from the settings section. The template you choose from here is the message template that will automatically go to your customer’s phone.
Phone Number
In order to send an SMS to your customer, you can enter the phone number of your customer in the Phone Number section.
Ticket ID
Ticket ID is the ticket number of the SMS sent.
E-Mail
You complete the step by entering contact information such as your customer’s name and e-mail in the Name and Mail section. Then when you click on the send message button, the sms will be sent.
You can also make any changes you want from the boxes under all contact information. Before sending the sms, you can make changes here and sms will be sent according to the changes you make.
Customer Can Choose
In the first button, the Customer Can Choose button, customers enter their own information. If you click this button and activate it, you don’t need to enter the contact information you will enter here. Customers enter their own information. So, you only have to command the message to be sent automatically.
Normal Assignment
If you activate the normal assignment button, customers who are normally assigned directly from the system are assigned to the operators differently this time. When you mark this button, customers are put in the pool and queued. so when it’s their turn and whichever operator is available for that moment, that operator talks to the customer.
Default Customer Type
This is where you can select your default customer type.
Direct Video Call
If you activate this button, the simultaneous video call will start when the sms is gone.
You can use these fields to get different information other than the information we have determined for the contact information of the customers. So you can make customizations as you wish.
ID No
The customer’s id number is entered here.
As you can see above, you can send sms to your customers by filling in the necessary information. In this way, your customers can use the link found in SMS when contacting you.
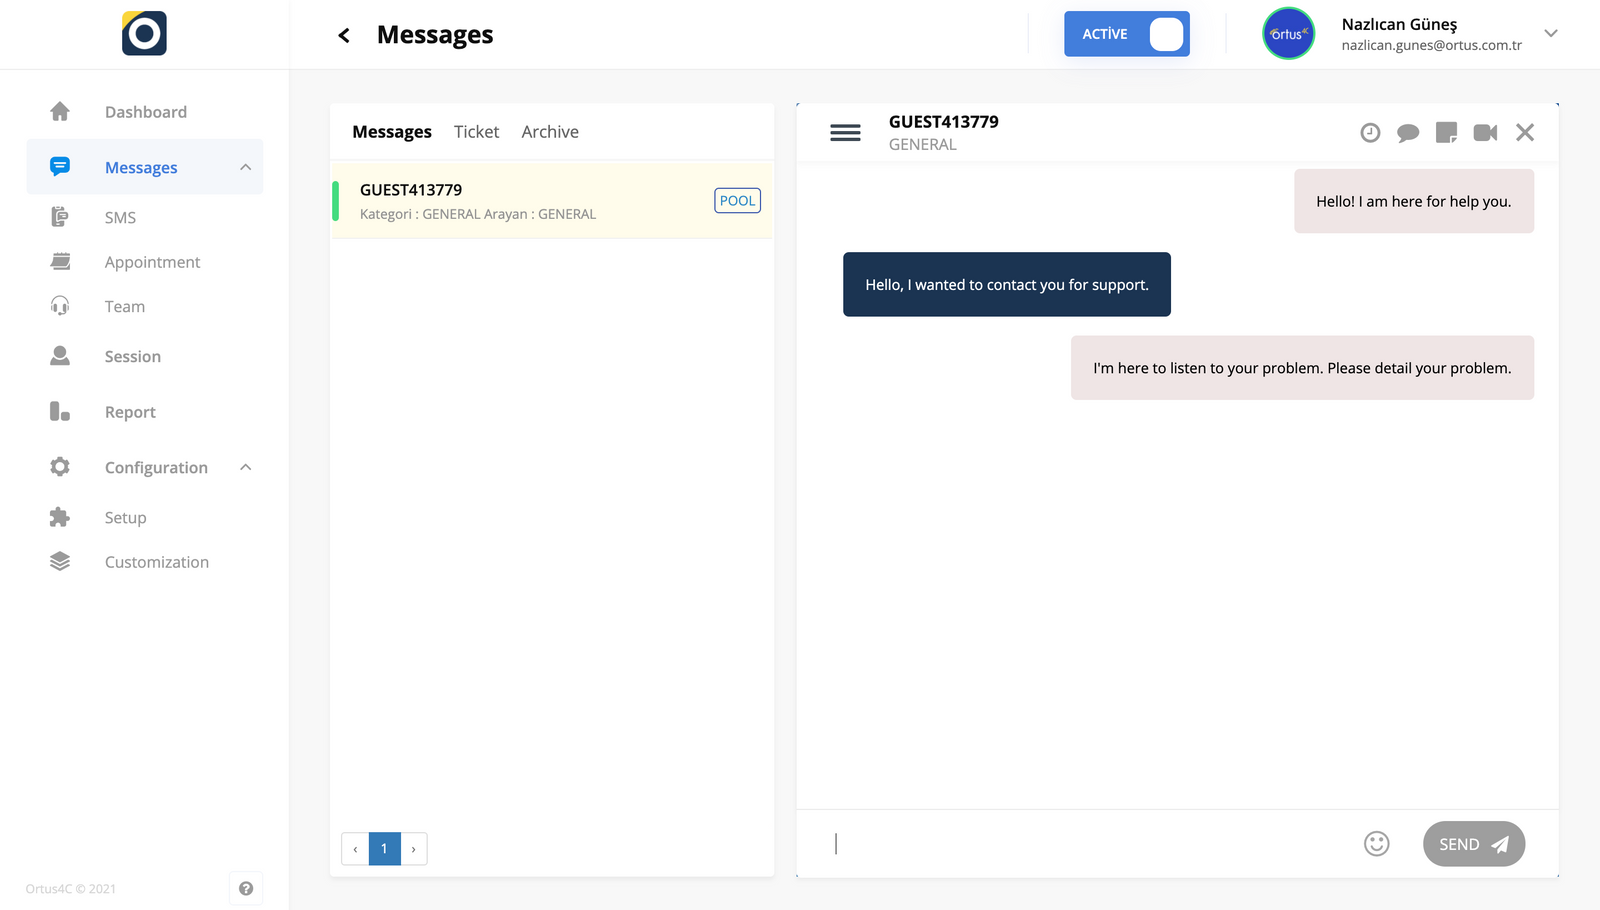
“El Kitabı ” bölümündeki ” Mesajlar” , müşterilerin ve müşteri hizmetleri temsilcilerinin mesajlaştığı sayfadır.
Geçmiş mesajlar da dahil olmak üzere mesajlarınızı sayfanın sol menüsündeki ana sayfanın alt kısmında yer alan Mesajlar sekmesinden görüntüleyebilir, arşivleyebilir ve biletleyebilirsiniz. Daha fazla bilgi için aşağıdaki makaleyi okuyabilirsiniz. ??
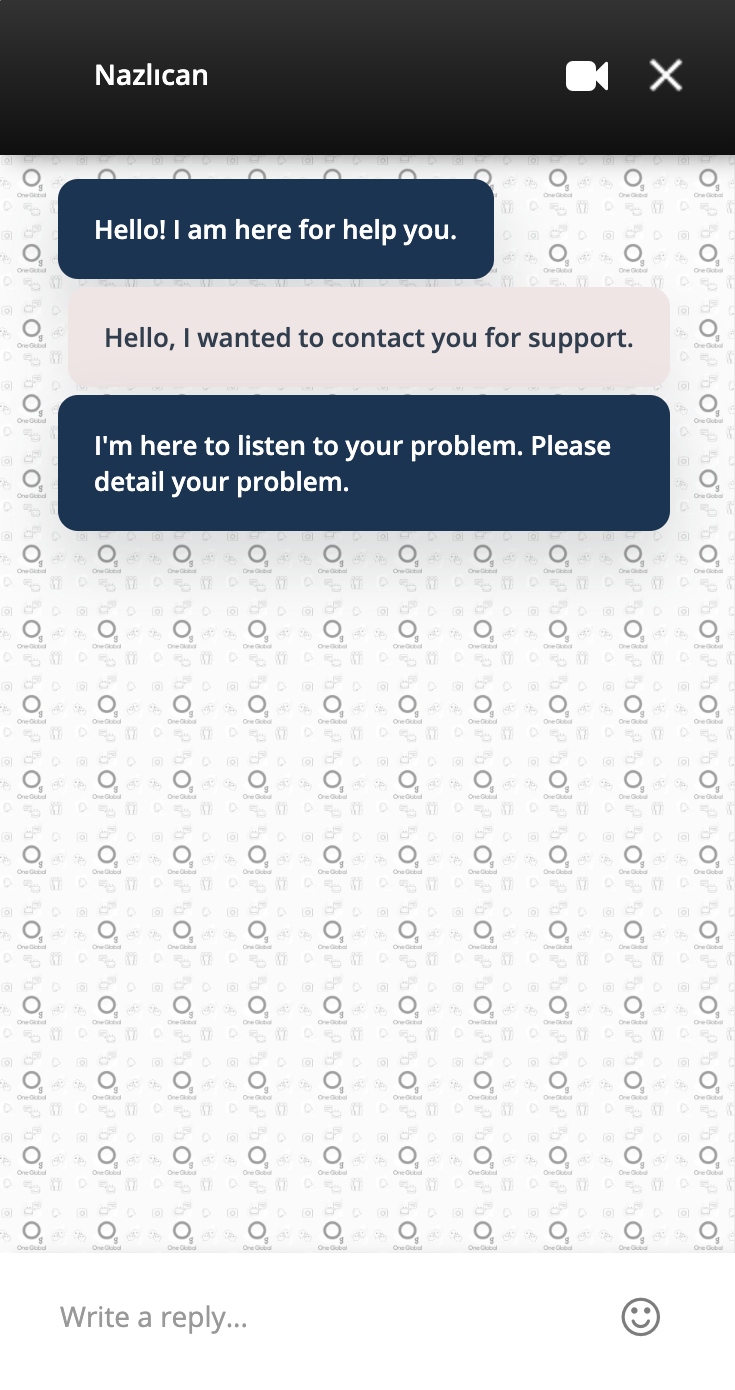
Müşterileriniz operatörlerle konuşurken şöyle bir ekranda konuşurlar ve şöyle bir ekran görürler. Yukarıda Nazlıcan yazan bölümde gördüğünüz gibi müşterilerin hangi operatörlere atandığı belirtiliyor. Buradaki tüm mesajlar operatörlerin mesajlar bölümüne düşüyor.
Yukarıdaki ekranda da görebileceğiniz gibi operatörler müşterilerle buradan iletişim kuruyor. Sizlere örnek teşkil etmesi ve zihninizde bir anlam ifade edebilmesi için örnek bir konuşma yaptık. Bizim ”Merhaba! Size yardımcı olmak için buradayım.” mesajımız otomatik olarak belirlediğimiz mesajlardır. Bu mesajları daha önceki yazılarımızda yazdığımız Özelleştirmeler bölümünden de düzenleyebilirsiniz. Lütfen diğer yazılarımıza da göz atmayı unutmayın!
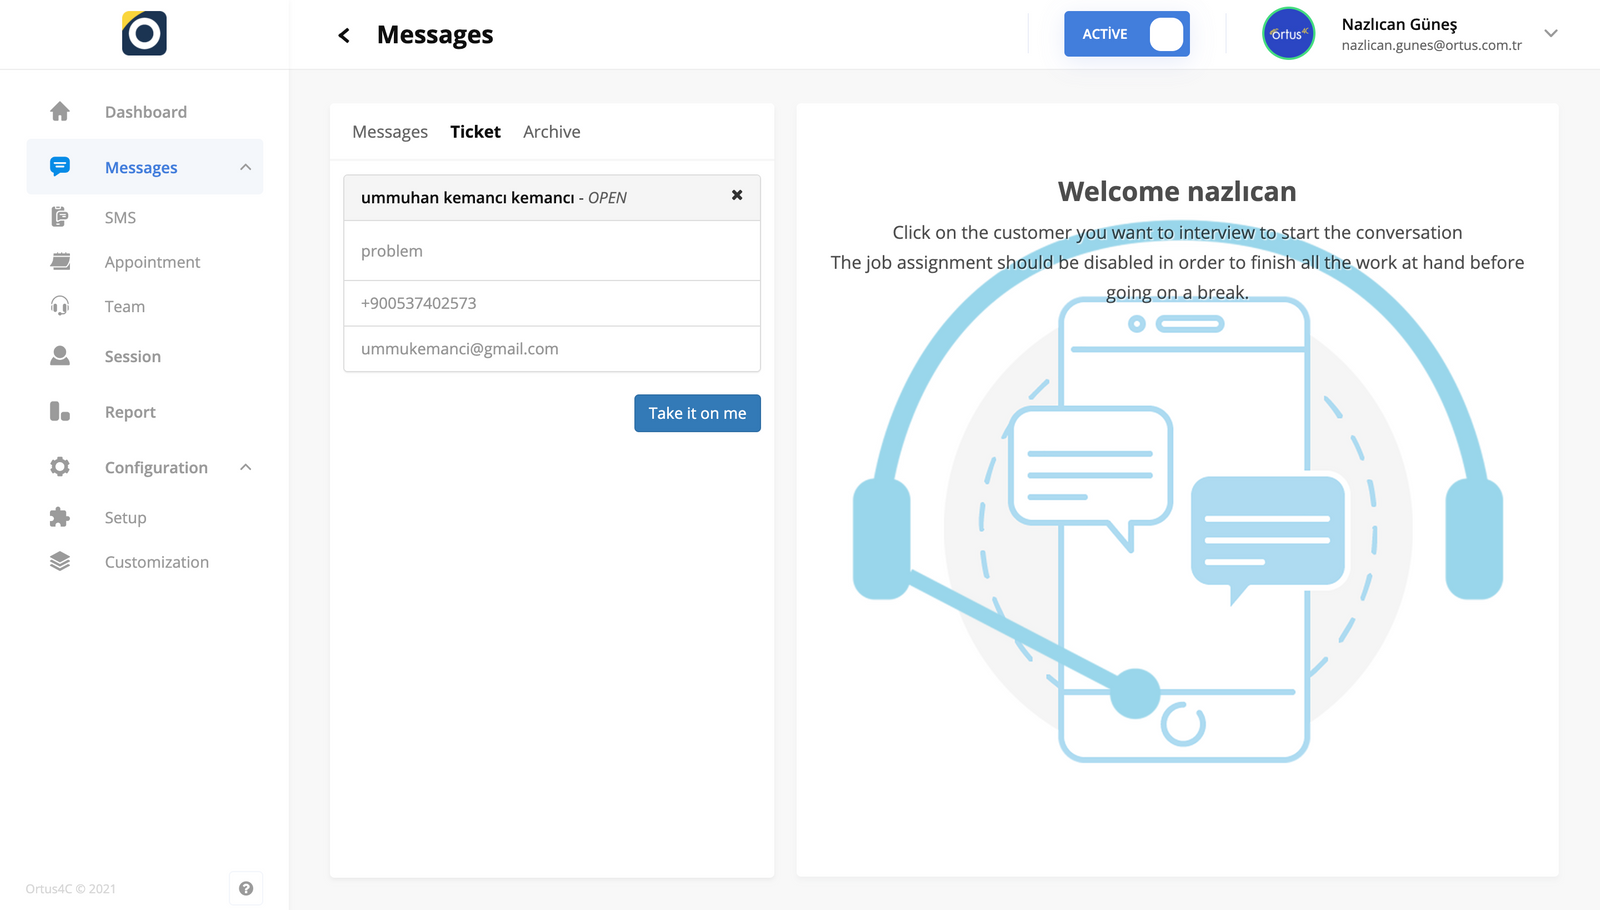
Bilet nedir?
Operatör, mesai saatleri dışında sisteme gönderilen offline mesajları ticket yaparak alır. Böylece müşteri ile iletişime geçer ve bunu e-posta yoluyla yapar. Mail ile geri dönüş yapılacaktır.
Bilet butonuna bastığınızda sizi şöyle bir ekran karşılayacak. Burada biletleme işlemini yapmak için müsaitlik durumunuzu aktifleştirmeyi unutmayın.
Bilet işlemini tamamlamak için bu ekrandaki operatöre tıklayın. Burada size örnek vermek için başka bir operatör arkadaşımızın işini ele alalım. Yani size bu işlemi adım adım gösterelim. Buradaki bilgiler otomatik olarak giriliyor. Siz ”üzerime al butonuna” tıkladıktan sonra işi üzerinize almış oluyorsunuz.
Bu işlemi yaptıktan sonra müşteri sizin havuzunuza düşer ve mesajlar bölümünüzde görünür. Burada müşteri ile konuşabilir ve müşterinin talep ettiği hizmeti yapabilirsiniz. Ayrıca bu işlemler mesajlarınıza düştüğünde sayfanın sağ üst köşesinde görülen bir bildirim alacaksınız.
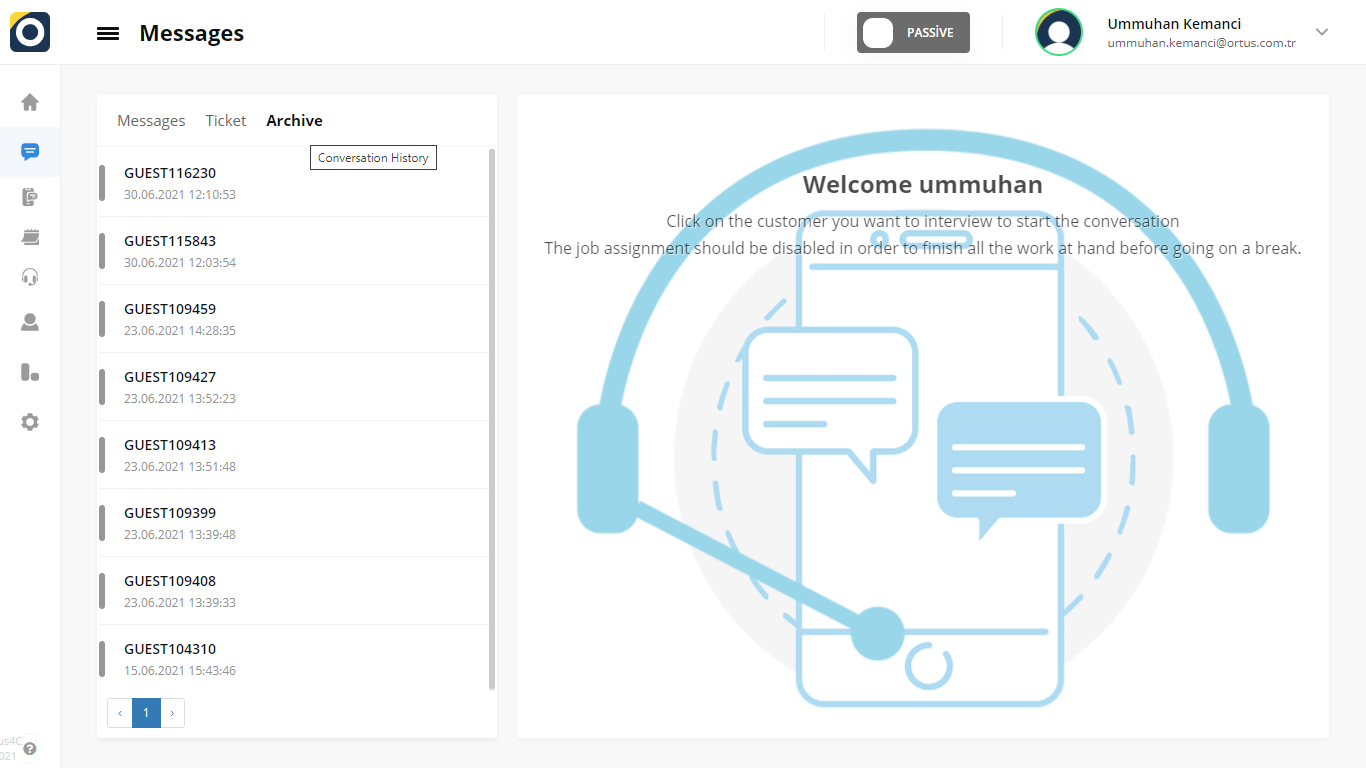
Görüşme sona erdiğinde operatör işi kapatır. Bu işlemden sonra, kapatılan mesaj arşiv bölümü. Burada eski mesajlarınızı gizleyebilirsiniz. Bu arşiv kısmı her operatörün sayfasında görünür. Müşterinin konuşmaları burada görünür.
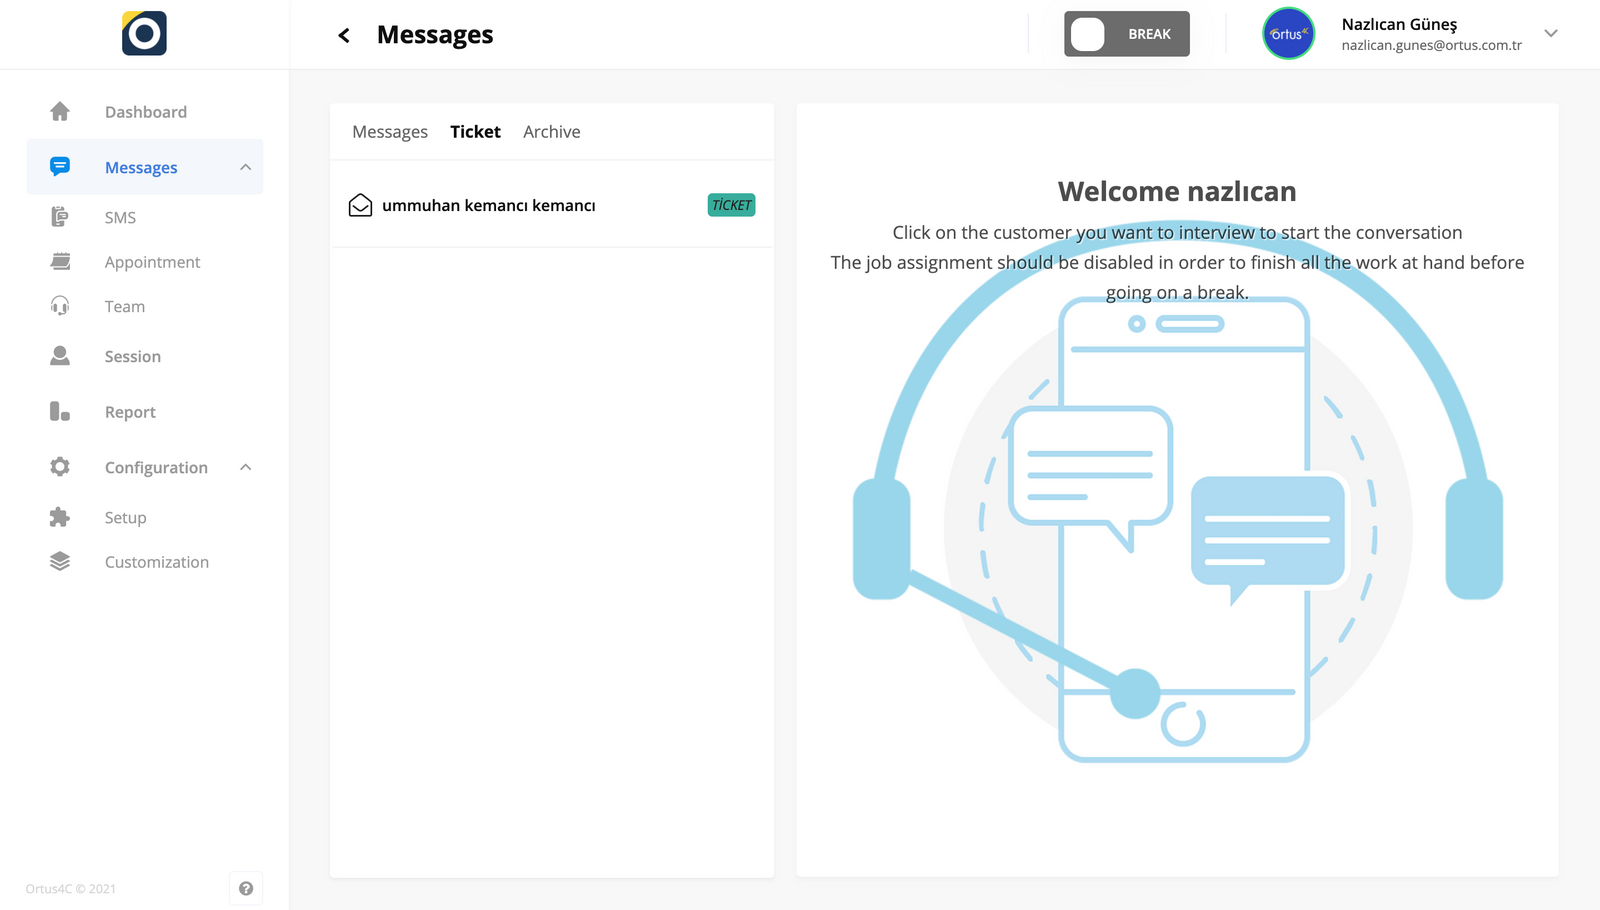
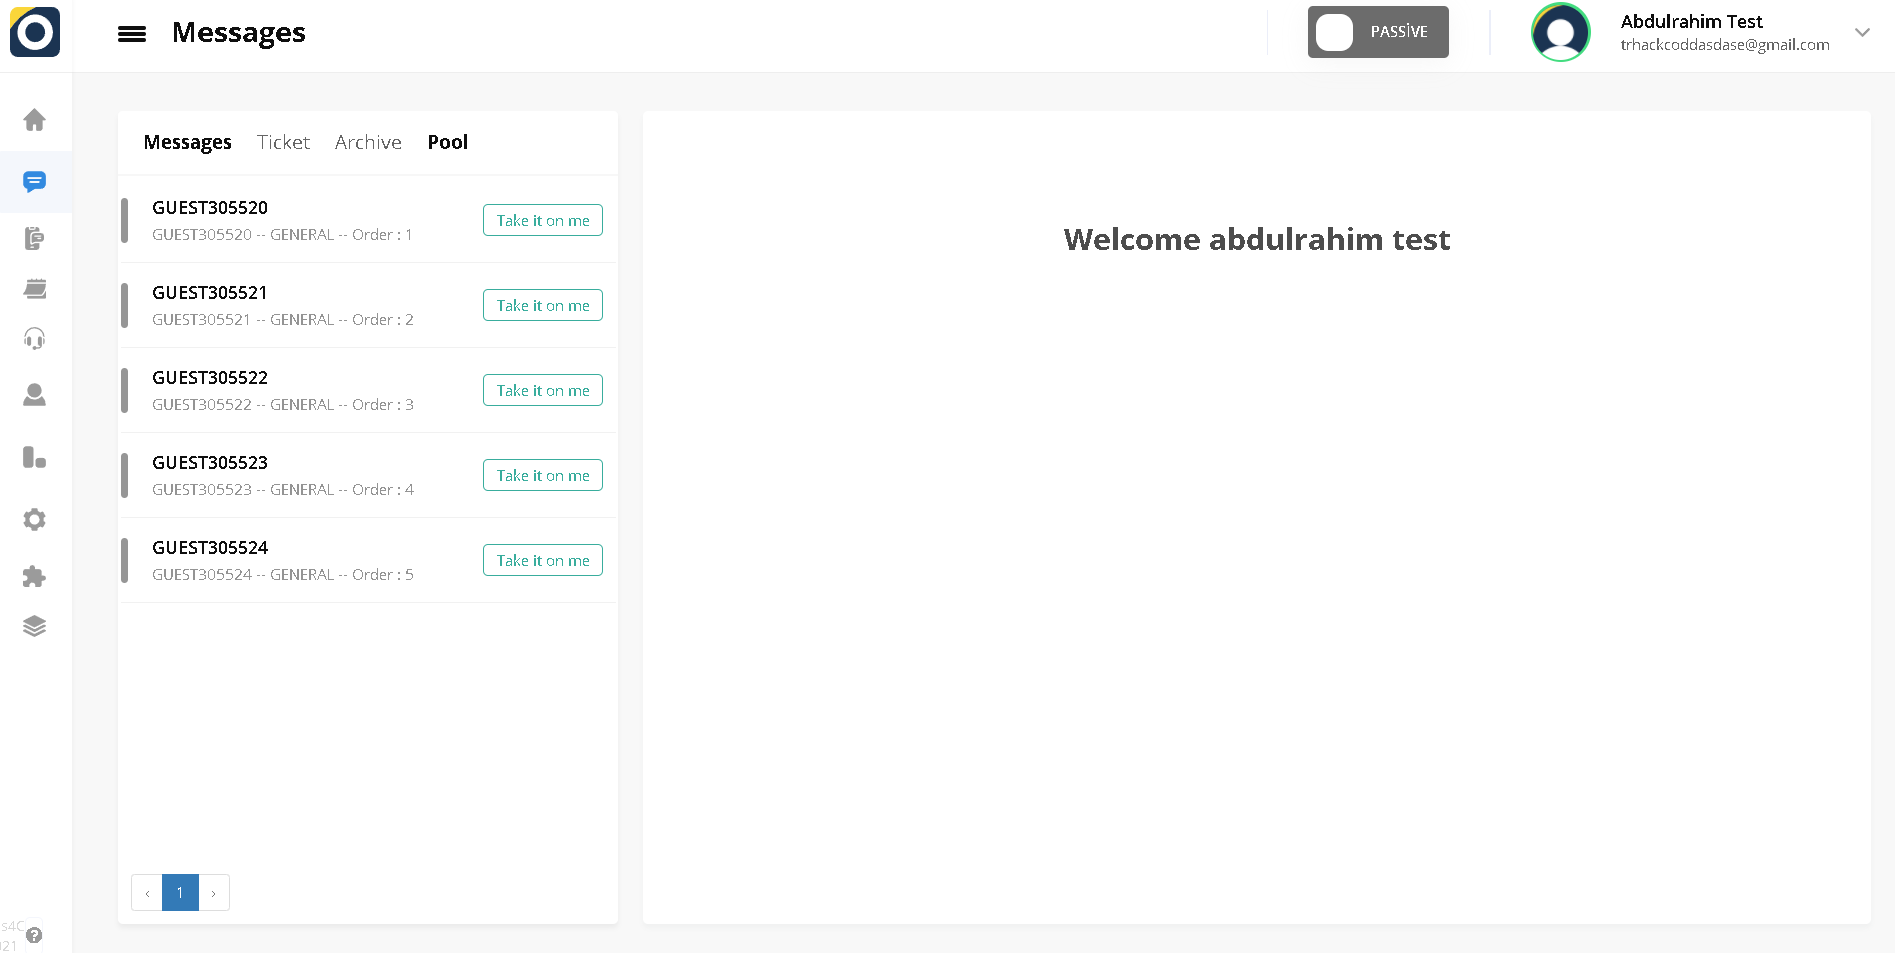
Havuz Bölümü nedir?
Biriken müşterilerin tek bir yerde toplanması gerekir. Bu bölüme Havuz adı verilir. Havuz bölümünde istediğiniz bir müşteriyi seçip üzerime al butonuna basarak müşteriyi kendinize atayabilirsiniz. Atanan müşteri Mesajlar bölümünde yer alacaktır.
“Messages” in the “Handbook” section is the page on which customers and customer service representatives are messaging. You can view, archive and ticket your messages, including past messages, from the Messages tab at the bottom of the main page on the left menu of the page. You can read the article below for more information. ??
When your customers talk to operators, they talk on a screen like this and they see a screen like this. As you can see in the section that says Nazlıcan above, it is indicated to which operators the customers are assigned. All messages here fall into the messages section of the operators.
As you can see on the screen above, operators communicate with customers from here. We have made an example talk in order to set an example for you and to be able to make sense in your mind. Our ”Hello! I’m here for help you.” message is the messages we have determined automatically. You can also edit these messages from the Customizations section we wrote in our previous articles. Please don’t forget to check out our other articles too!
What is ticketing?
The operator takes the offline messages sent to the system outside of working hours by making a ticket. Thus, they communicate with the customer and do this via e-mail. It will be returned by mail.
When you press the ticket button, you will be greeted with a screen like this. Don’t forget to activate your availability to make the ticketing process here.
Click on the operator on this screen to complete the ticket transaction. Let’s take the job of another operator friend to give you an example here. So let us show you this process step by step. The information here is entered automatically. After you click the ”take it on me button”, you take the job on yourself.
After making this operation, the customer falls into your pool and appears in your messages section. Here you can talk to the customer and make the service requested by the customer. You will also receive a notification stating, which is seen in the upper right corner of the page, that when these things fall into your messages.
When the conversation ends, the operator closes the job. After this process, the closed message is moved to the archive section. Here you can hide your old messages. This archive part is visible on every operator’s page. Customer’s conversations appear here.
What is Pool Section?
The accumulated customers must be gathered in one place. This section is called the Pool. You can assign the customer to yourself by selecting a customer you want in the Pool section and pressing the Take it on me button. The assigned customer will be in the Messages section.
El Kitabı” bölümündeki “Pasif – aktif”, müşteri hizmetleri temsilcileri tarafından kullanılan durum göstergesidir. Mevcut pasif ve aktif seçenekler, çalışma sürenizi ve çalışmadığınız zamanı gösterir. Daha fazla bilgi için aşağıdaki makaleyi okuyabilirsiniz.
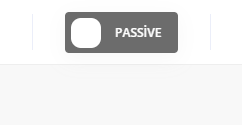
Sağ üstte bulunan “pasif” seçeneğini “aktif” hale getirerek“mesajlar“ bölümünde size atanan işleri görüntüleyebilirsiniz. Sağ üstte yer alan “aktif” seçeneğini “pasif” hale getirmek için işinize bir süre ara verebilir ya da “devre dışı bırakma nedenlerinden” birini seçerek mesainizi sonlandırabilirsiniz.
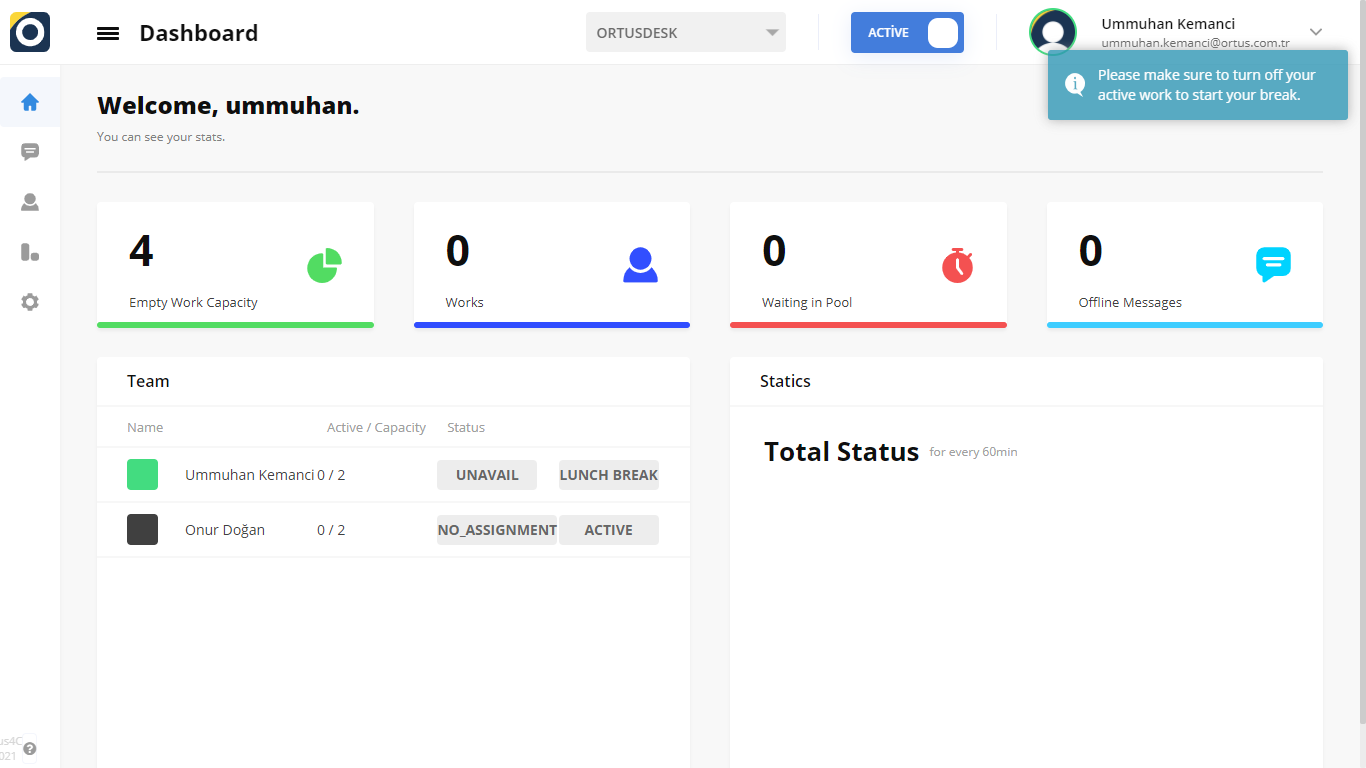
Lütfen molaya başlarken aktif çalışmanızı kapattığınızdan emin olun.
Yukarıda görebileceğiniz gibi, operatörler aktif durumdan pasif duruma geçerken bir uyarı alacaklardır. Yukarıdaki resimde de görebileceğiniz gibi, durumunuzu devralmadan önce mevcut işletmelerinizi kapattığınızdan emin olun.
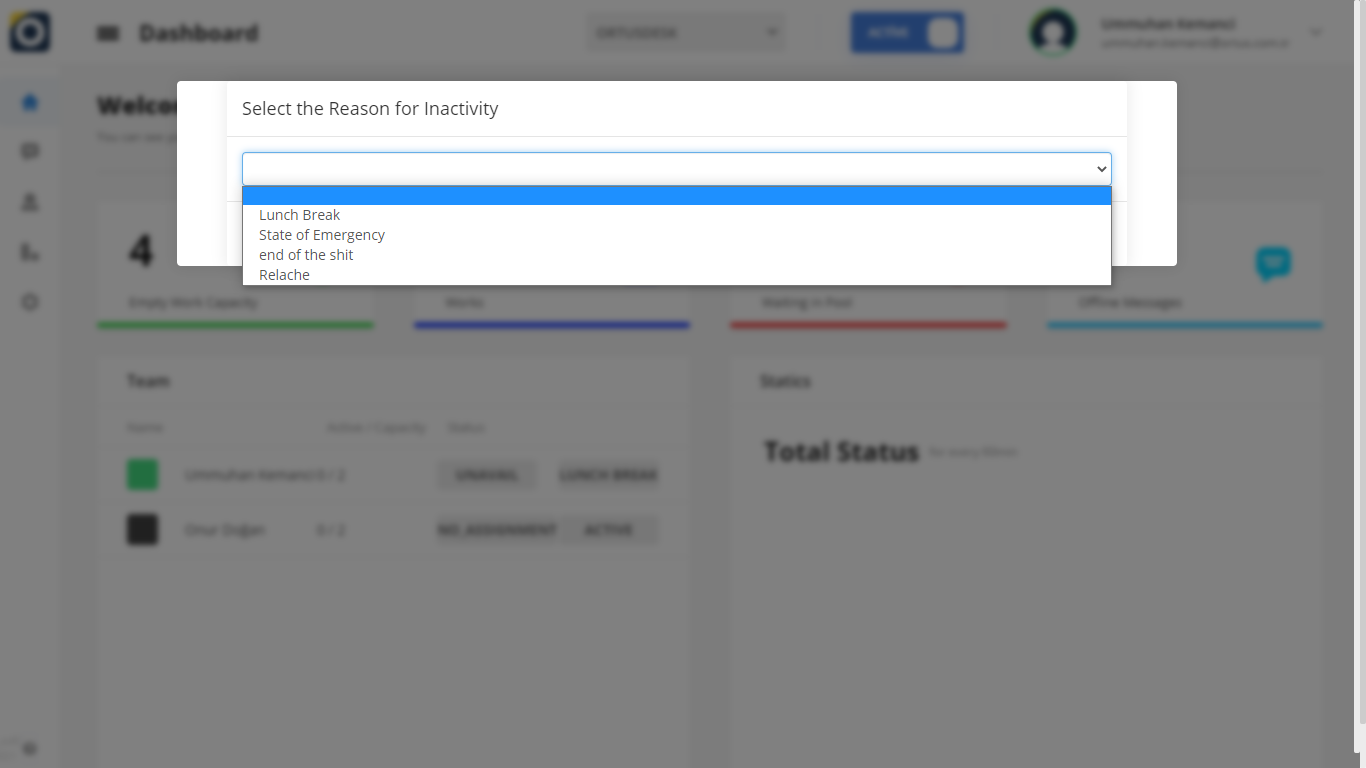
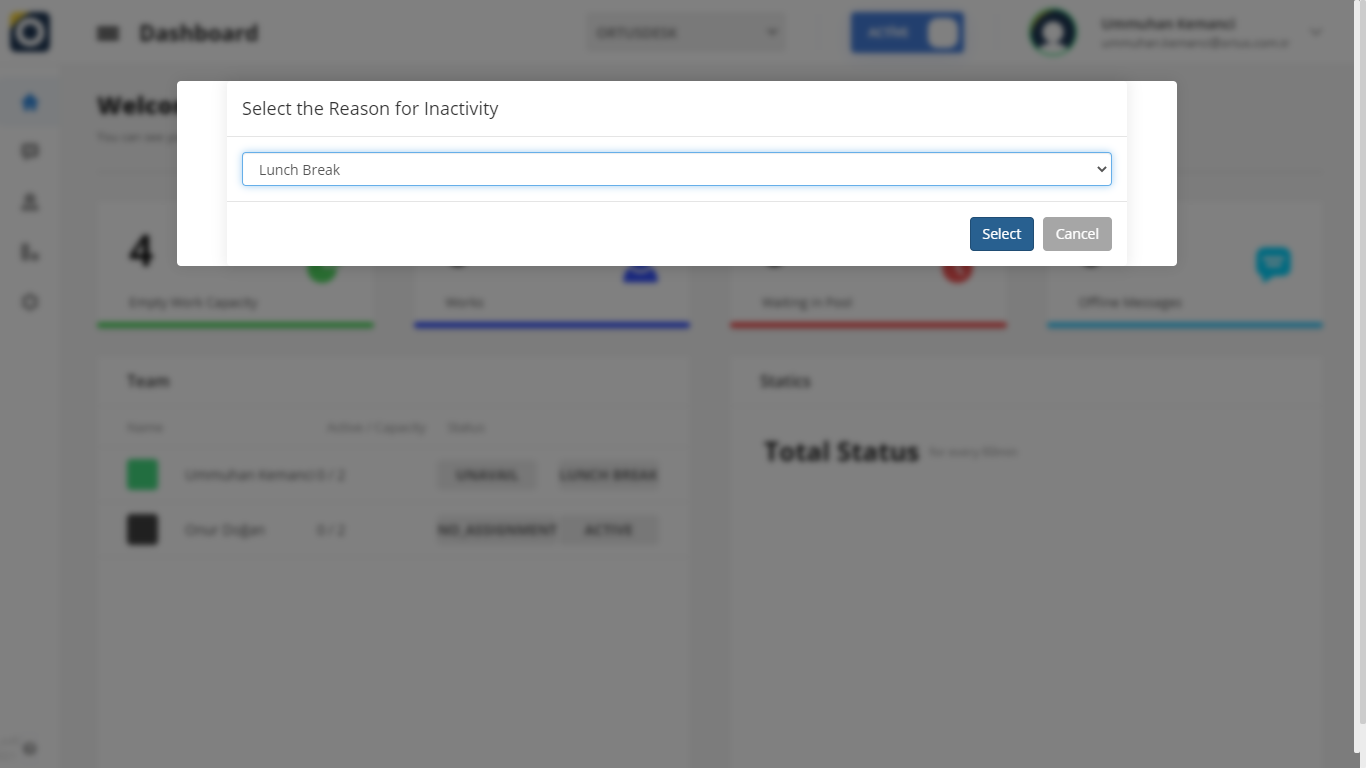
Ayrıca, aktiften pasife geçerken, ekranda var olanlar şeklinde mola nedenini belirtmelisiniz. Detaylı mola nedeni ayarları içinburaya tıklayınız.
“Passive – active” in the “Handbook” section is the status indicator used by customer service representatives. Existing passive and active options show your working time and non-working time status. You can read the article below for more information??
You can view the jobs assigned to you in the “messages” section by turning the “passive” option which is on the top right to “active”. In order to turn the “active” option in the upper right into “passive”, you can take a break from your work for a while or end your shift by selecting one of the “reasons for deactivation”.
Please make a sure to turn off your active work the start your break.
As you can see above, operators will receive a warning when moving from active to passive. as you can see in the picture above, be sure to close your existing businesses before you take over your situation.
Also, when switching from active to passive, you should indicate the reason for the break in the form of those that exist on the screen. Click here for detailed break reason settings.