Category: Uncategorized

Break Reason

Break Reason

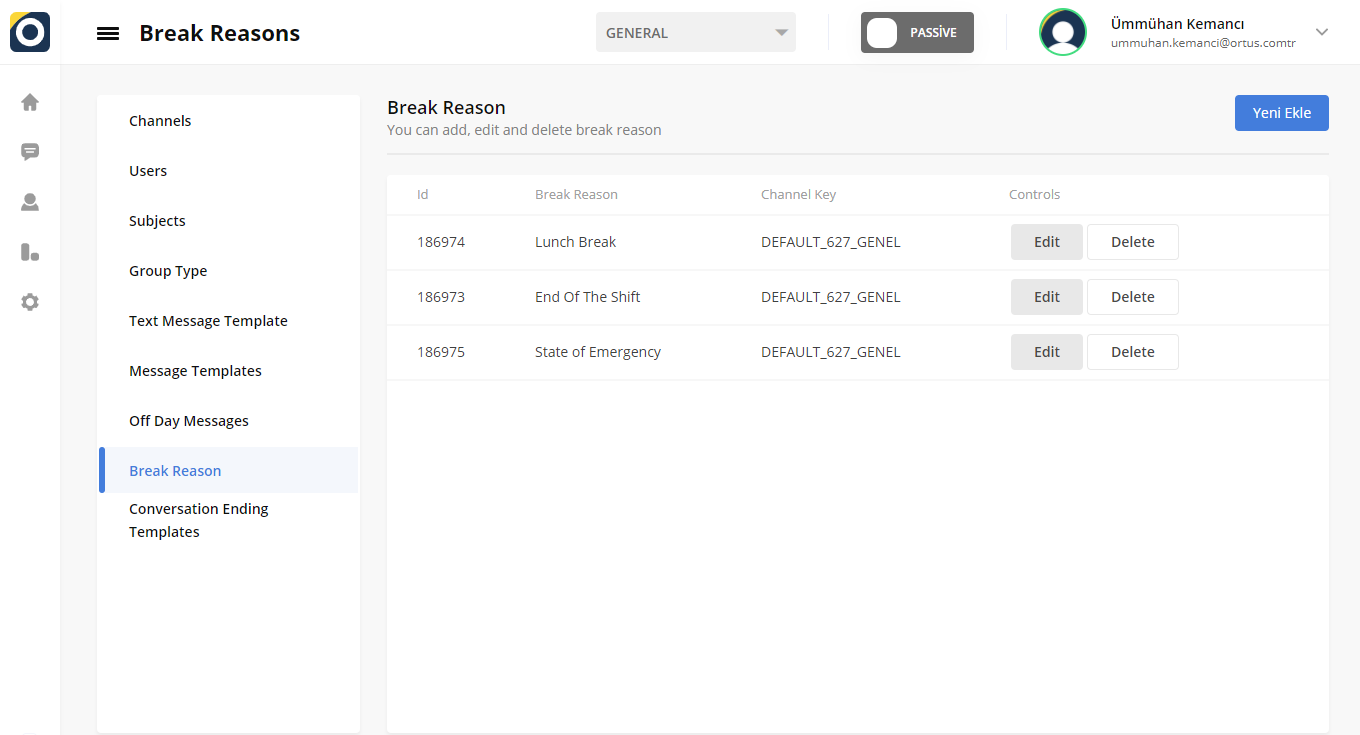
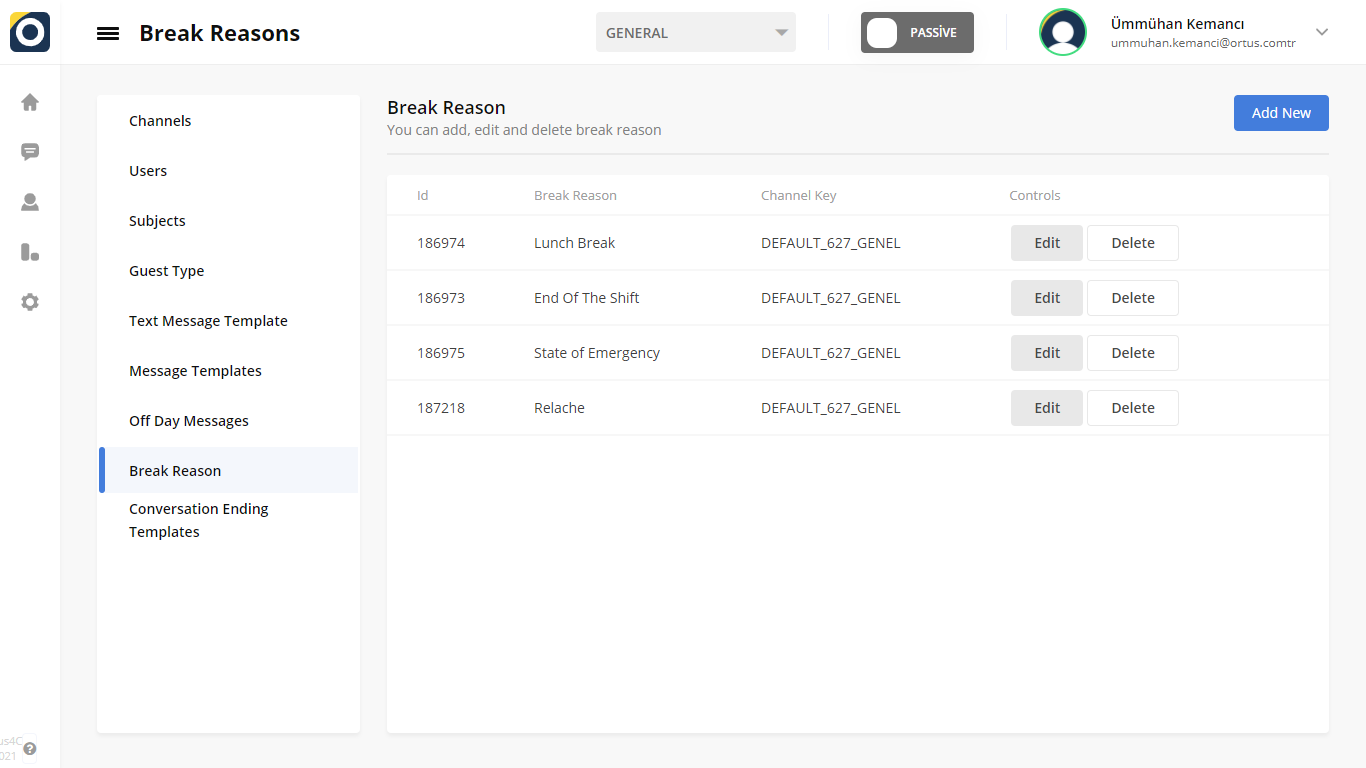
“Break Reason” in the “Configuration” section are templates used by customer service representatives. These templates are templates that inform the reason that customer service representatives use when moving from active to passive. Here you can create, edit and delete a new break reason. You can read the article below for more information??

The reasons you stated here will be used to indicate the transition of the operators in the system from the active to the passive state. An inactive operator cannot reply to any messages. In this case, the messages written by the customer to the operator will fall into the “Messages” > “Ticket” section. When the operator switches from passive to active, the messages can be accessed from the “Messages” > “Ticket” section. Preparing these templates is entirely in your hands. The reasons for your personalized break will be displayed by your other operators and will be available for each operator when moving from active to passive.

Add New to Break Reasons

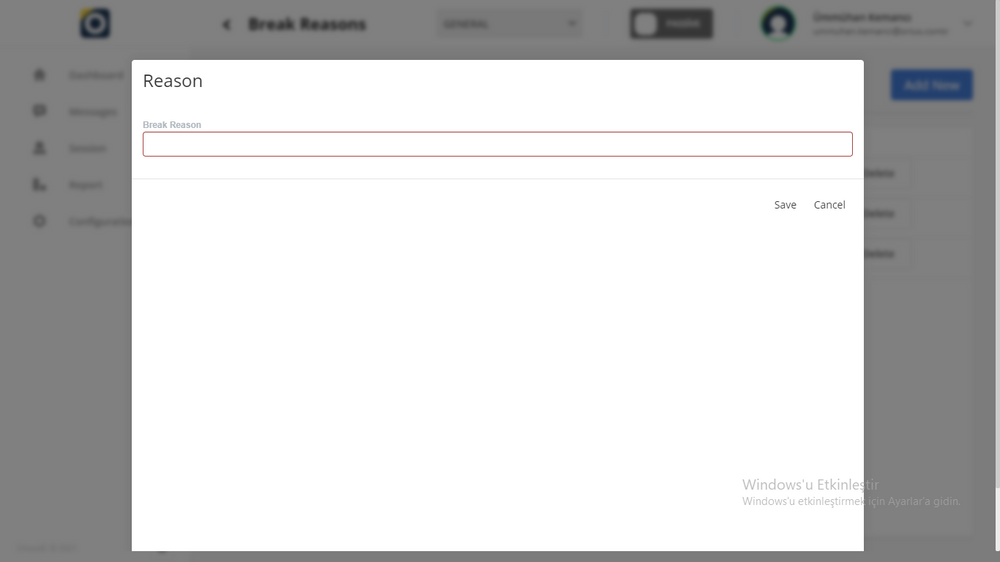
If you click the ”Add New” button, you will see this screen. If you enter break reason information in the add new section, your templates will be ready.

Break Reason

The break reason is the area where you will specify your cause when moving from active to passive.

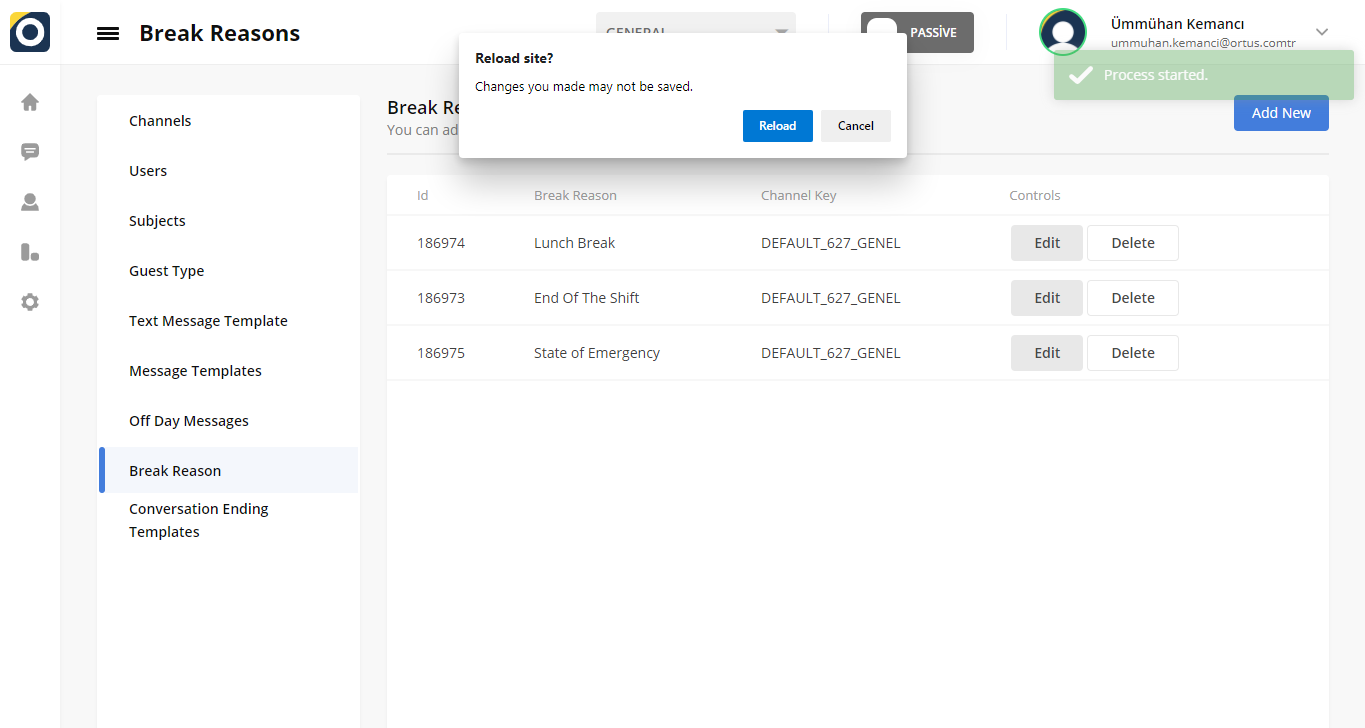
You will receive a warning to save changes on the home screen because you have added a new break reason. You can install it into the system by pressing the “reoland” key to save the changes. when the process of adding a new break reason is complete, you will see the “process started” in the upper-right corner of the main screen. It’s Ready!

Edit to Break Reasons

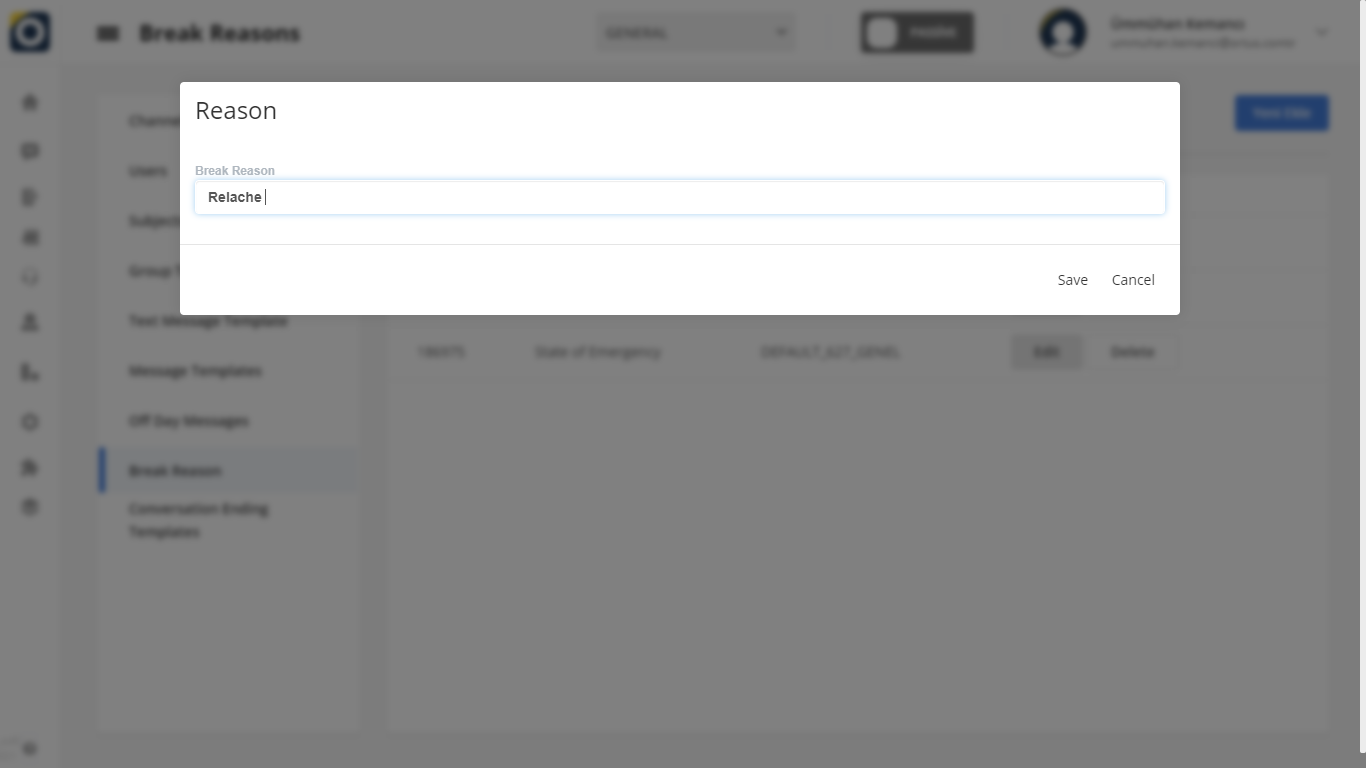
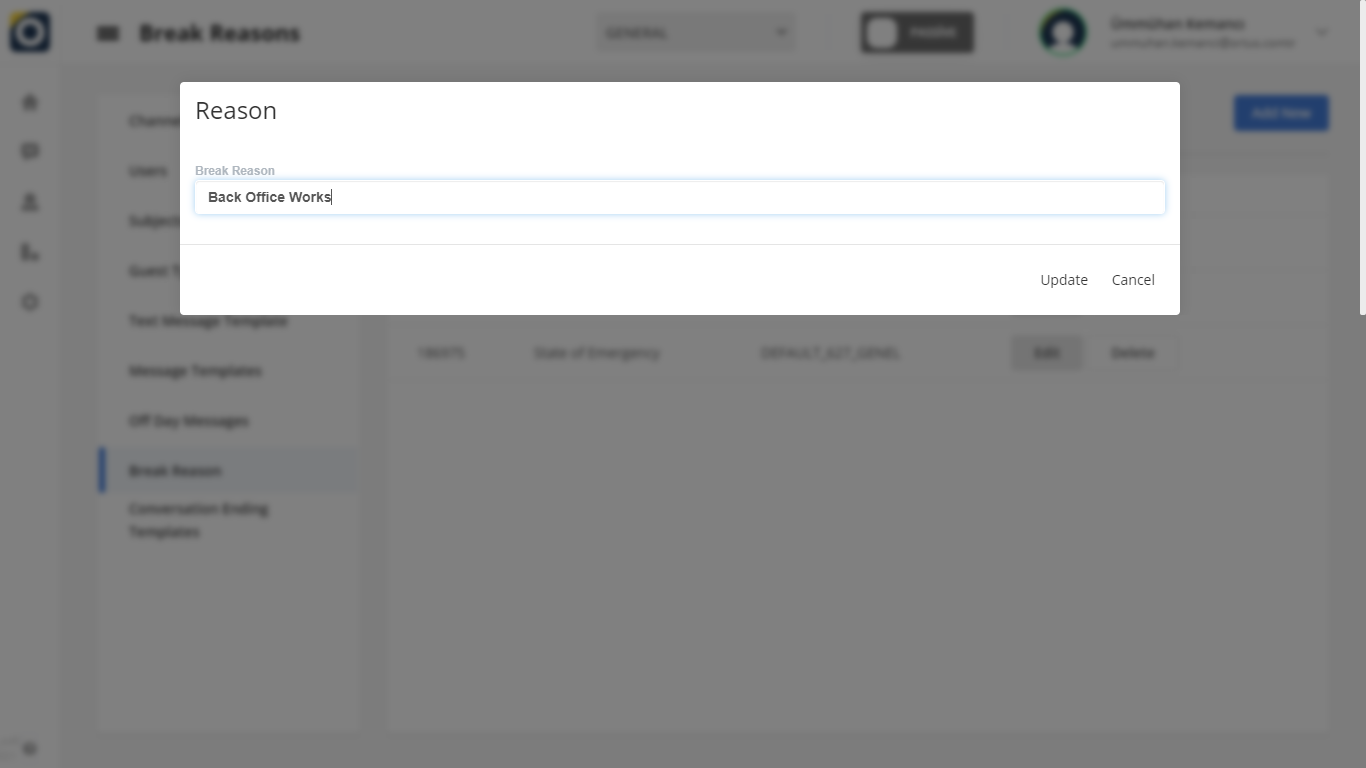
You can to edit the reason for the break, you can use the “Edit” option in the column where the reasons for the break are written. The reason for your break will change in the direction you want. When editing is complete, you will see the update successful statement in the upper-right corner of the Home screen. It’s Ready!

Delete to Break Reasons

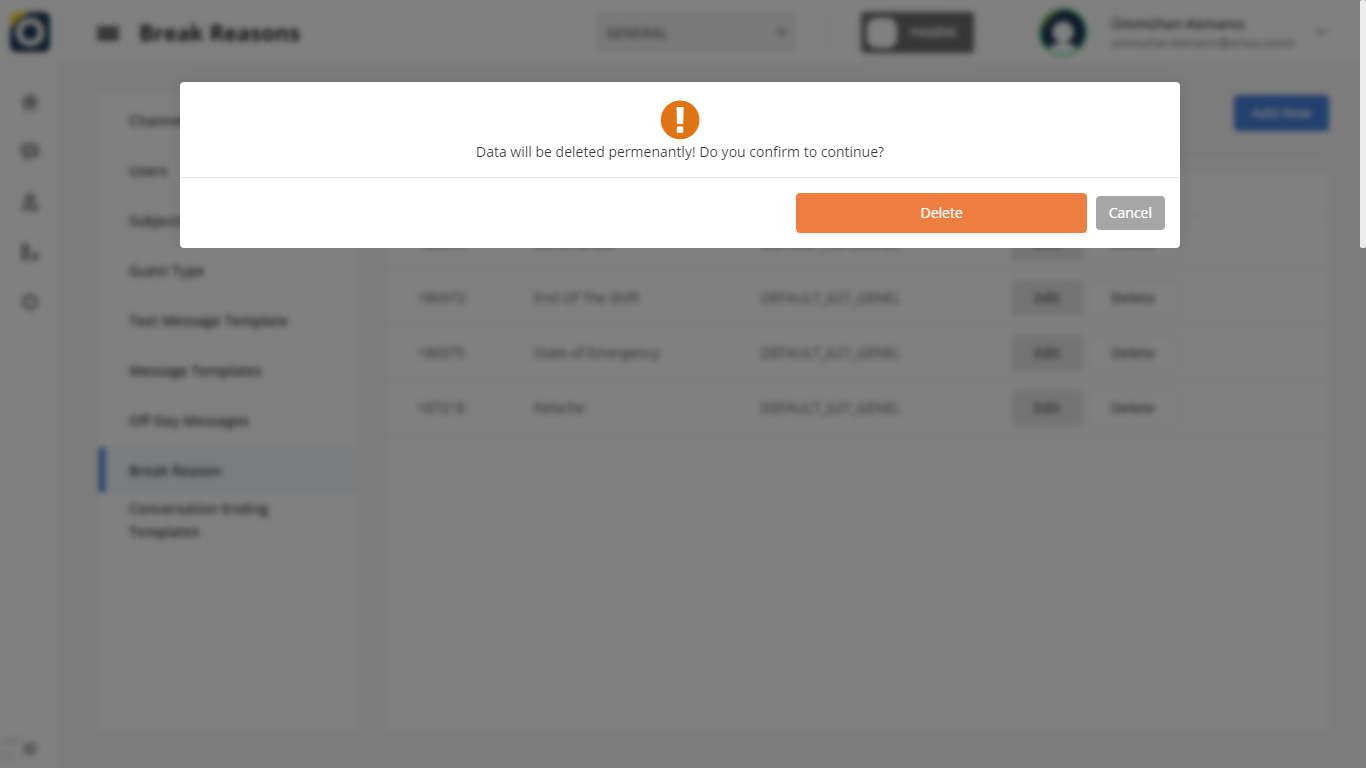
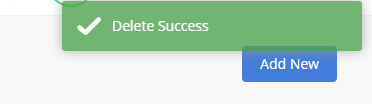
You can to delete your break reasons, you can use the Delete option in the break reason column. When the deletion is complete, you will see the Delete successful statement in the upper-right corner of the Home screen. Ready

That’s it!

Still need help? Message Us

Subjects

Subjects

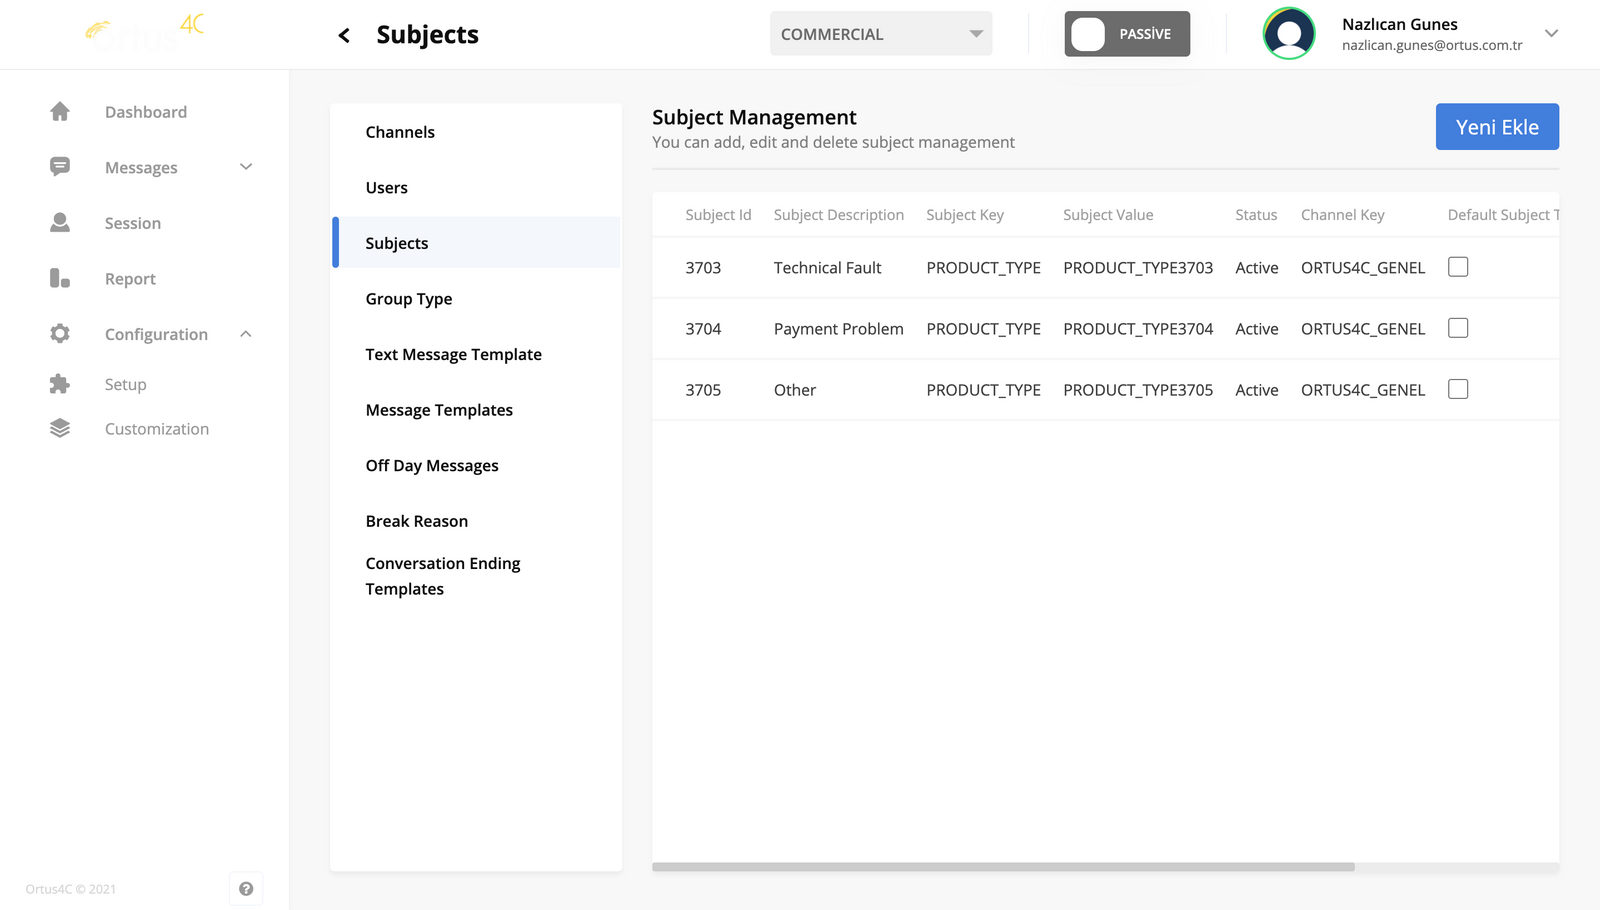
“Subjects” in the “Configuration” section are templates used by customer. Customers will select the issue they are having problems with when connecting to the customer service representative, so the operator will be able to see what the customer is having problems with at the beginning of the conversation. In this way, they will have faster access to the support and service they want. Here you can create, edit, and delete subject management. You can read the article below for more information. ??

We have included a few topics here to serve as an example for you. Here you can specify topics. Although we have given examples to guide you, there isn’t a single type of these subjects. These topics according to the purpose and service of the companies. You can add new topics here according to the services of your own company, make edits by making changes.

We can give a few more examples from our own customers. For example, the support line of a customer organization which is a non-governmental organization, has different information according to them. These topics contain a lot of information such as donations, information, suggestions, appointments, help requests or thanks.

On the other hand, for our customer of a company that has a digital content production platform like Netflix in Turkey, the subjects such as membership cancellation, campaigns, billing information and more. The trick is to consider what your customers may request for support and your company’s services and goals. After making this observation, it will be easier for you to determine the subjects related to the needs of your company and customers.

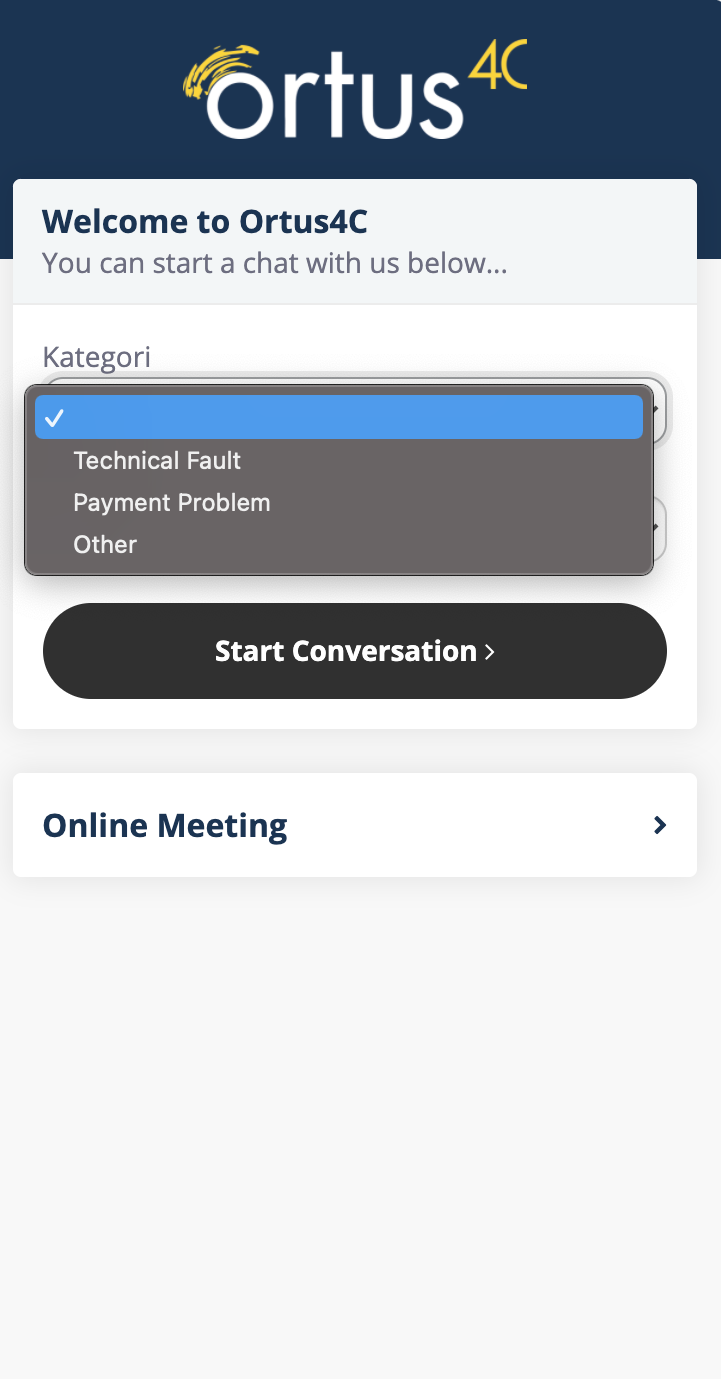
Also, I wanted to show you the stance of the subjects I uploaded to set an example for you through OrtusDesk. When you specify your categories, a page like this will appear in front of your customers. Thus, they will access the support and service they want faster.

Add New to Subject

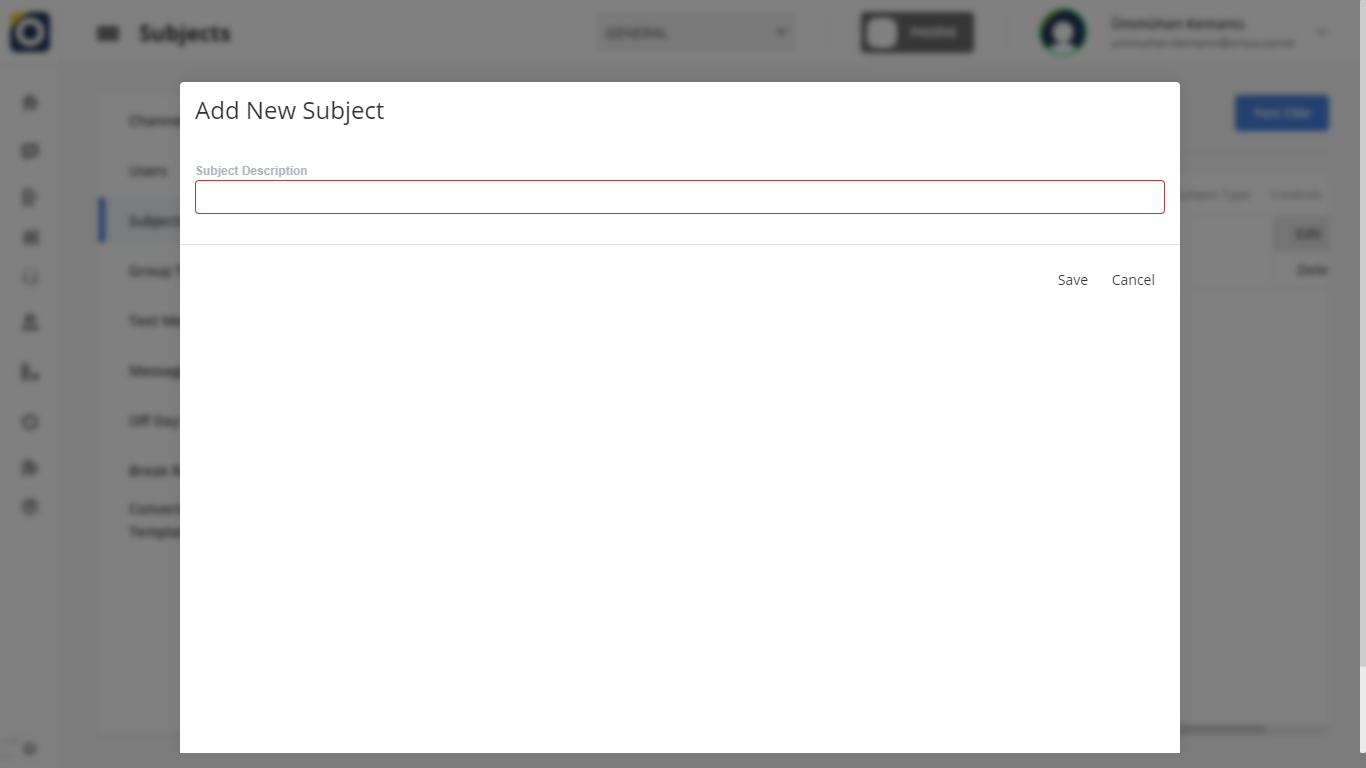
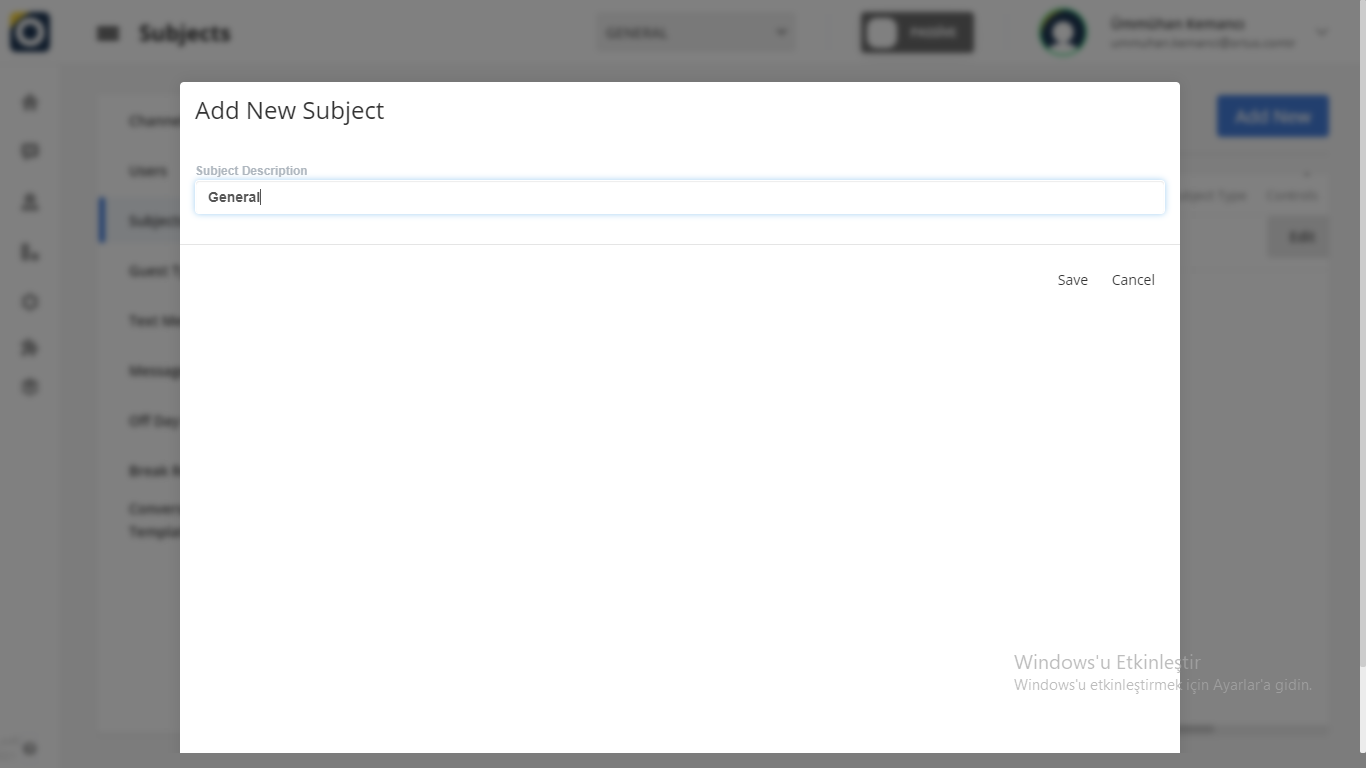
If you click the ”Add New” button, you will see this screen. If you enter subject description information in the add new section, your templates will be ready.

The topics you will set here will also seen on your customers’s screen. This allows you to identify categories so that your customers get better service. You can add new subjects from the button which is ”add new”.

After clicking this button, there will be a screen above. After entering the subject description here, you will create a subject. Again, you can make the changes as you wish from the edit and delete sections next to the topics.

Edit To Subject

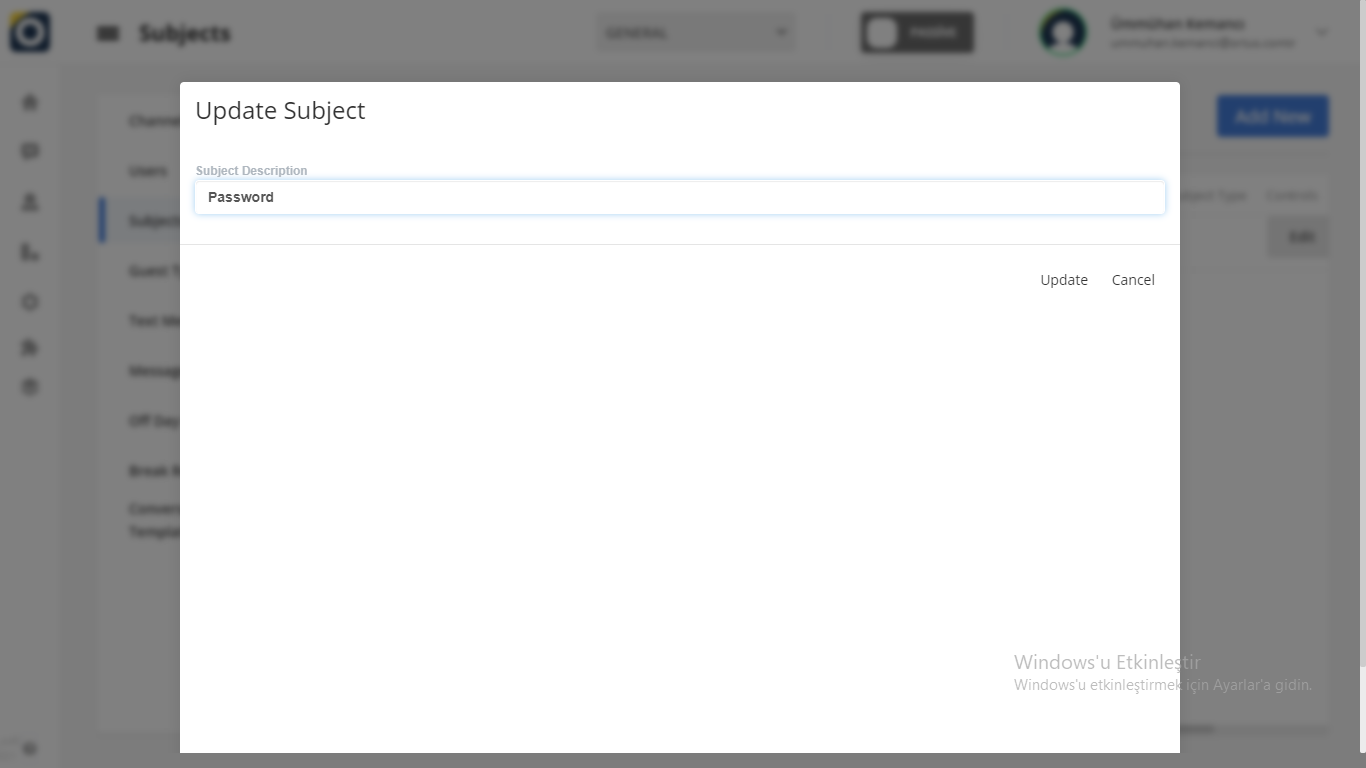
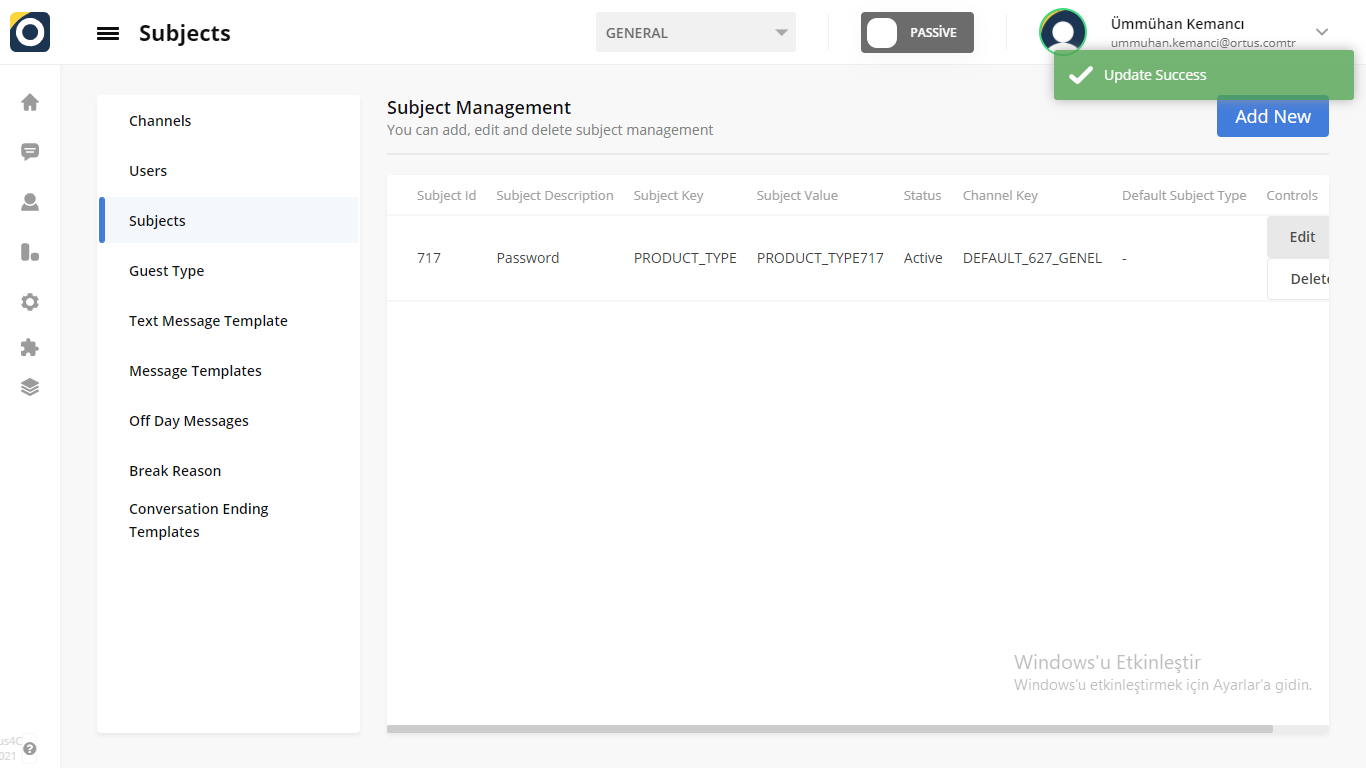
You can use the “Edit” option in the text column to edit the subject. The text you edit will change in the desired direction. When editing is complete, you will see the update successful statement in the upper-right corner of the Home screen. It’ s Ready!

Delete to Subject

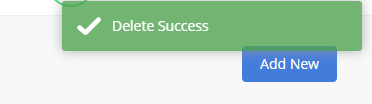
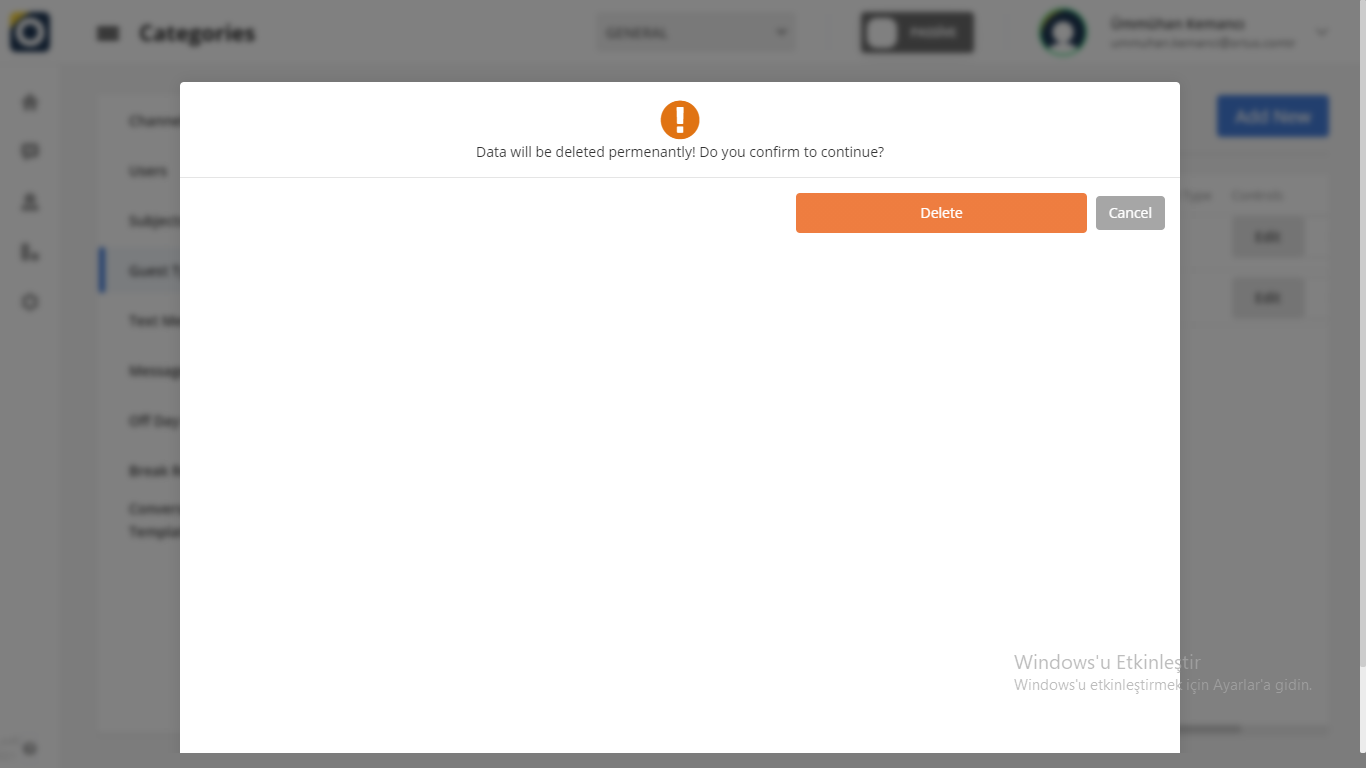
You can use the “Delete” option in the message column to delete your subject. When the deletion is complete, you will see the Delete successful statement in the upper-right corner of the Home screen. It’ s Ready

That’s it!

Still need help? Message Us

Homepage

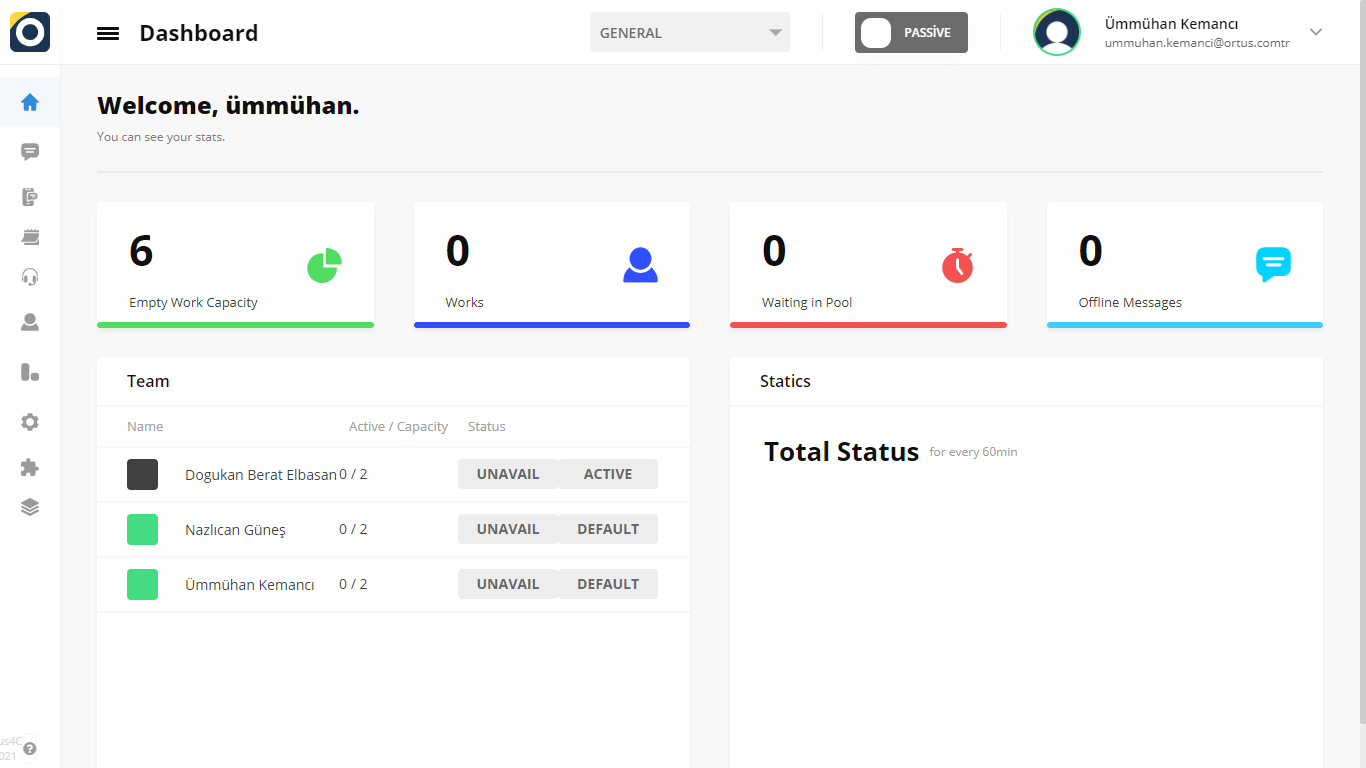
“Homepage “ in the  “Handbook” section is the homepage of customer service representatives. From the homepage, you can see the number of operators available online for you in the Team section and review your statistics. You can also view your existing jobs, pool waiters, and offline messages. You can read the article below for more information. ??

The Empty Capacity

The Empty Capacity works section shows the customer capacity that an operator can receive. Let’s make this more understandable by giving an example. For example, if an operator’s capacity is to take 5 customers, 5 customers will correspond with them when they arrive. If there is the 6th one the customer will be queue. Admin can increase or decrease the capacity of operators by editing them in the settings. The operator cannot do the same.

Here’s how admins can edit this section: Settings > Customization > User

Works

In the works section, you can view how many jobs have been assigned to your system and the number of jobs available.

Waiting in Pool

Your customers will appear in the message section and will be able to seen in your system. You can use the waiting in pool section so you can see the number of customers waiting in line. In the offline messages section, your customers will fill out offline forms despite out-of-hours conversations. The answers they have filled in here and the messages they have left will also appear in the Offline Messages section.

Team

In the Team Section, operators who are waiting in the pool and will take care of your customers who want to receive services will be listed in the team section. You will able to see every your operator on your team in here. It is determined in the system whether they are available or not, and according to this the customers are assigned an operator. In addition, you have the opportunity to see and review by viewing which operator is available.

Statistics

The statistics section is a very easy function to observe and examine your situation. Here your status is updated for every 60 minutes, so you can keep up to date with your work.

As you can see in the above text and articles, the homepage is the page that faces the operator after logging in and where the daily workflow is located. here are the jobs that take place during the day, as well as changes that you customization using other options. in addition, the work you do here will be automatically registered in the reports section.

That’s it!

Still need help? Message Us

Passive-Active

Passive-Active

“Passive – active” in the “Handbook” section is the status indicator used by customer service representatives. Existing passive and active options show your working time and non-working time status. You can read the article below for more information??  

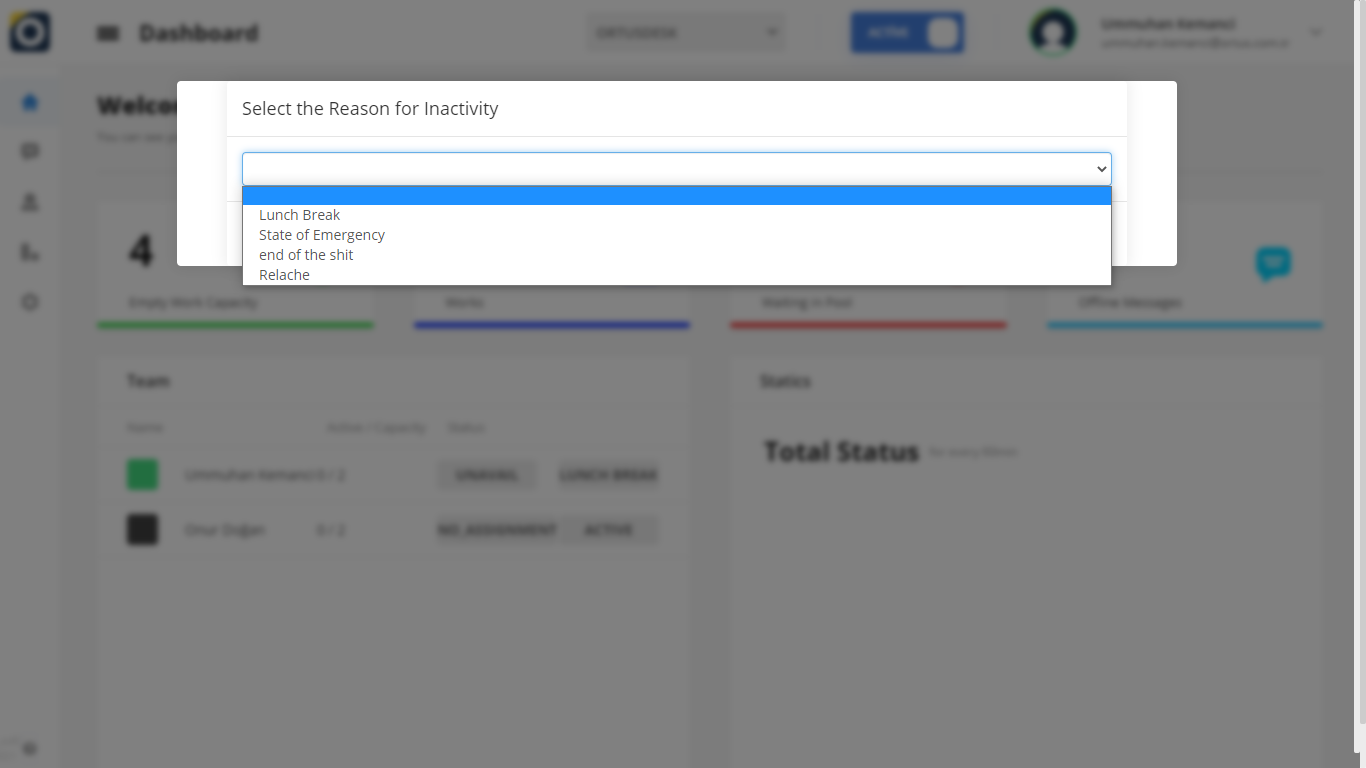
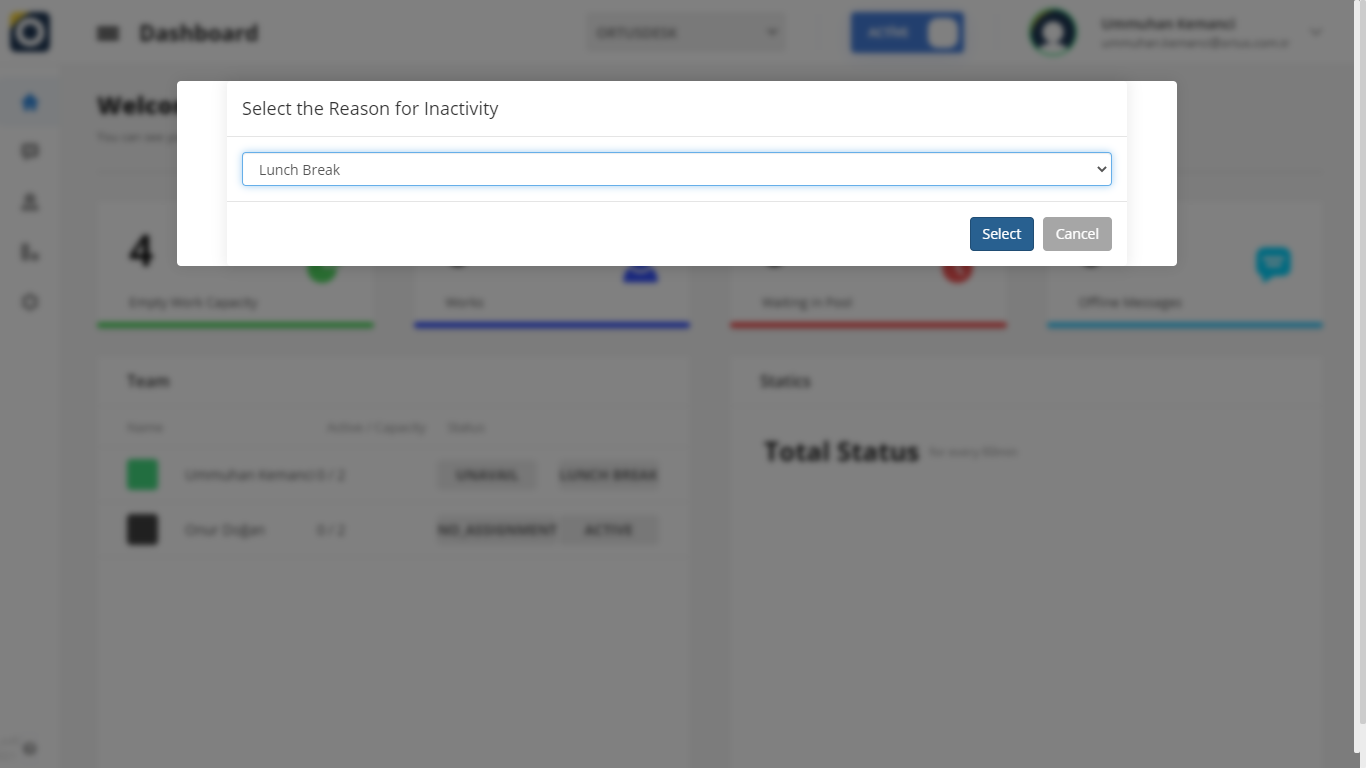
You can view the jobs assigned to you in the “messages” section by turning the “passive” option which is on the top right to “active”.   In order to turn the “active” option in the upper right into “passive”, you can take a break from your work for a while or end your shift by selecting one of the “reasons for deactivation”.

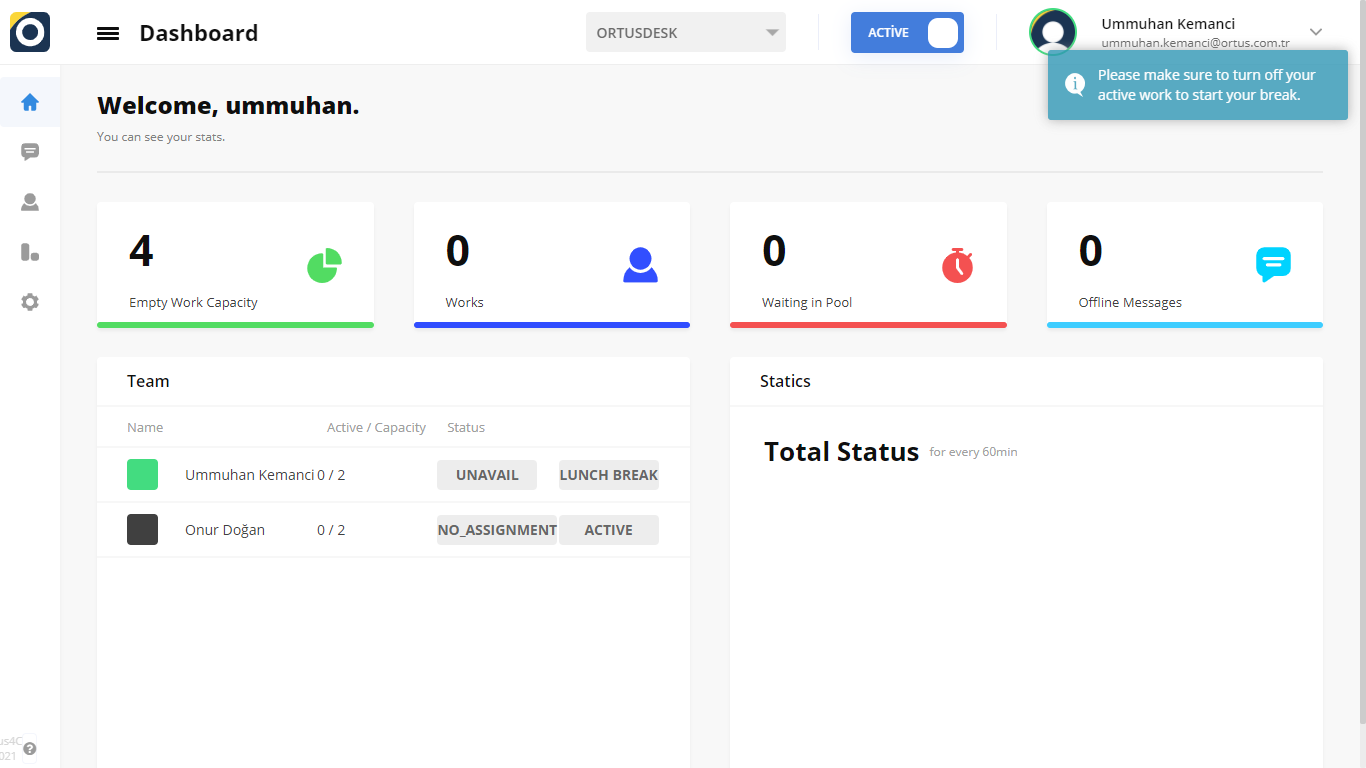
Please make a sure to turn off your active work the start your break.

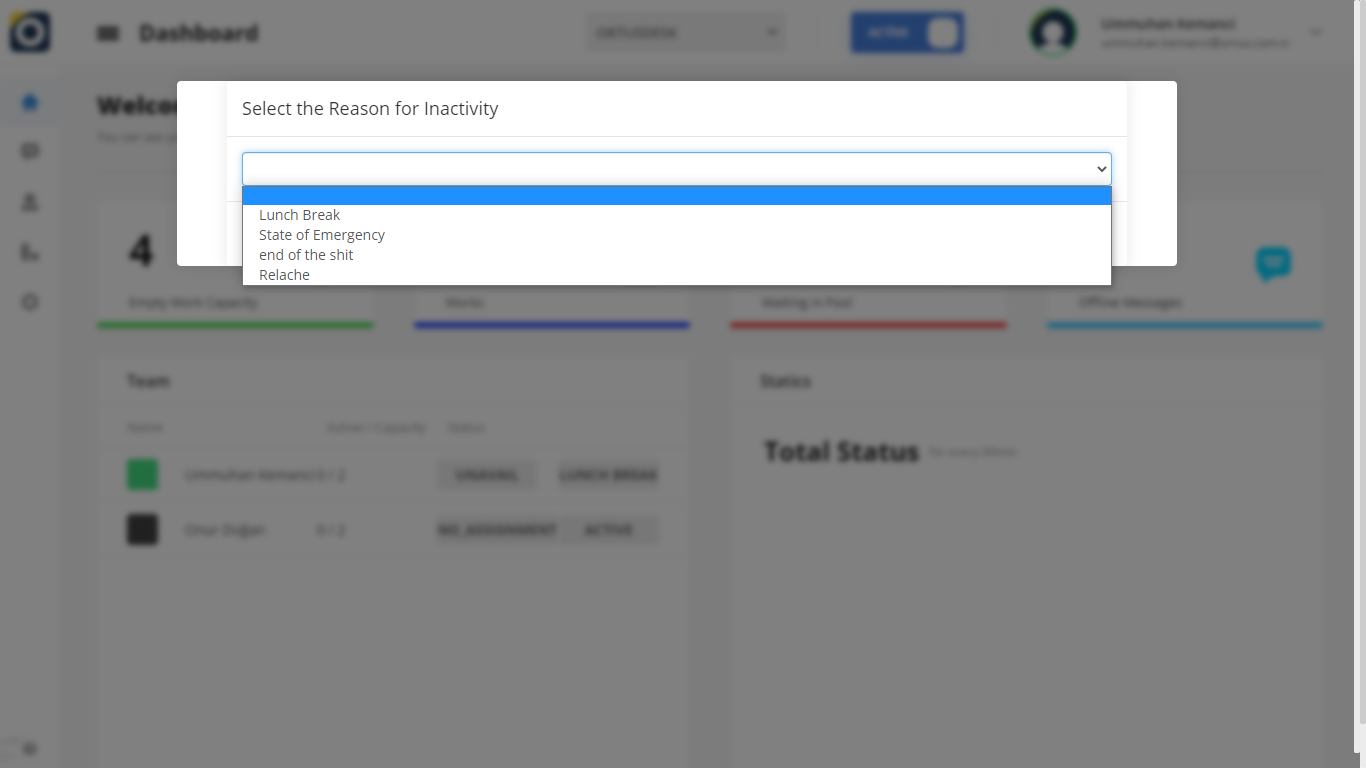
As you can see above, operators will receive a warning when moving from active to passive. as you can see in the picture above, be sure to close your existing businesses before you take over your situation.

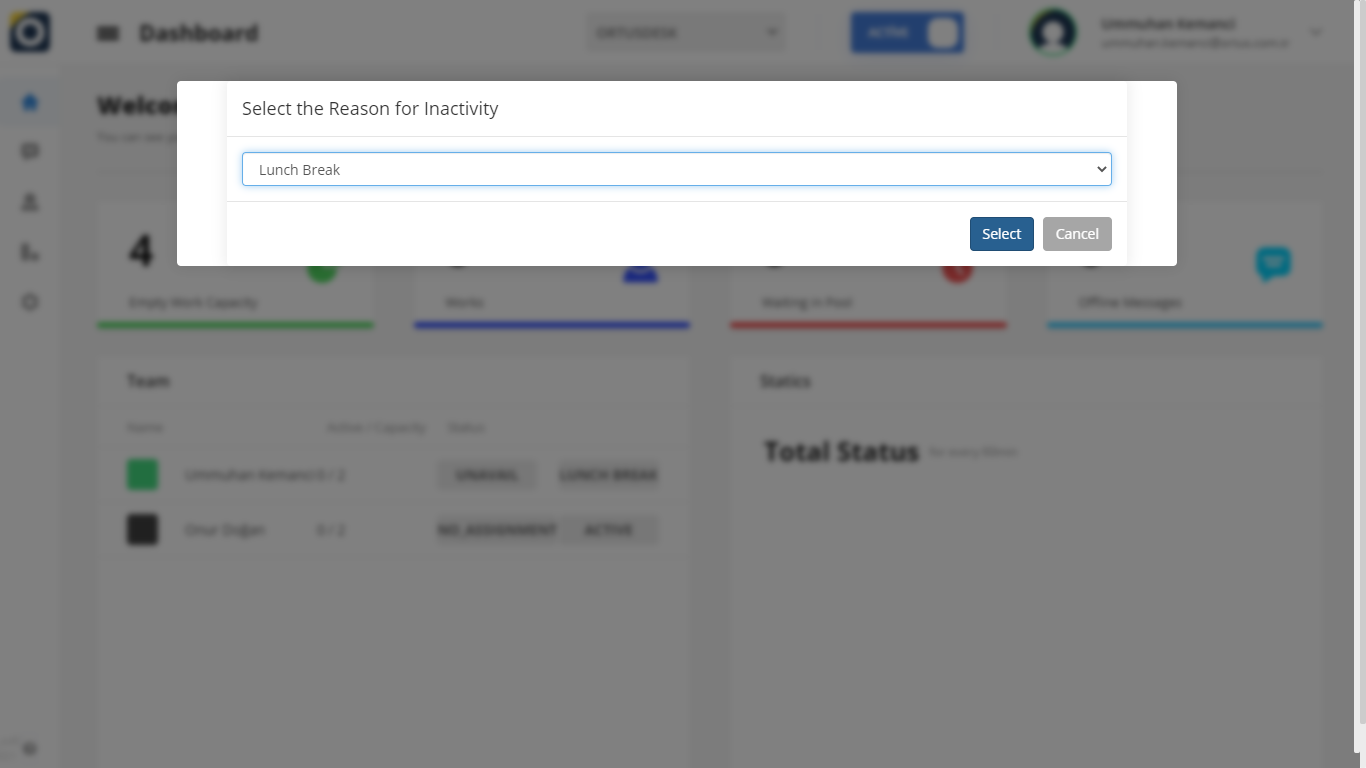
Also, when switching from active to passive, you should indicate the reason for the break in the form of those that exist on the screen. Click here for detailed break reason settings.

That’s it!

Still need help? Message Us

Messages

Messages

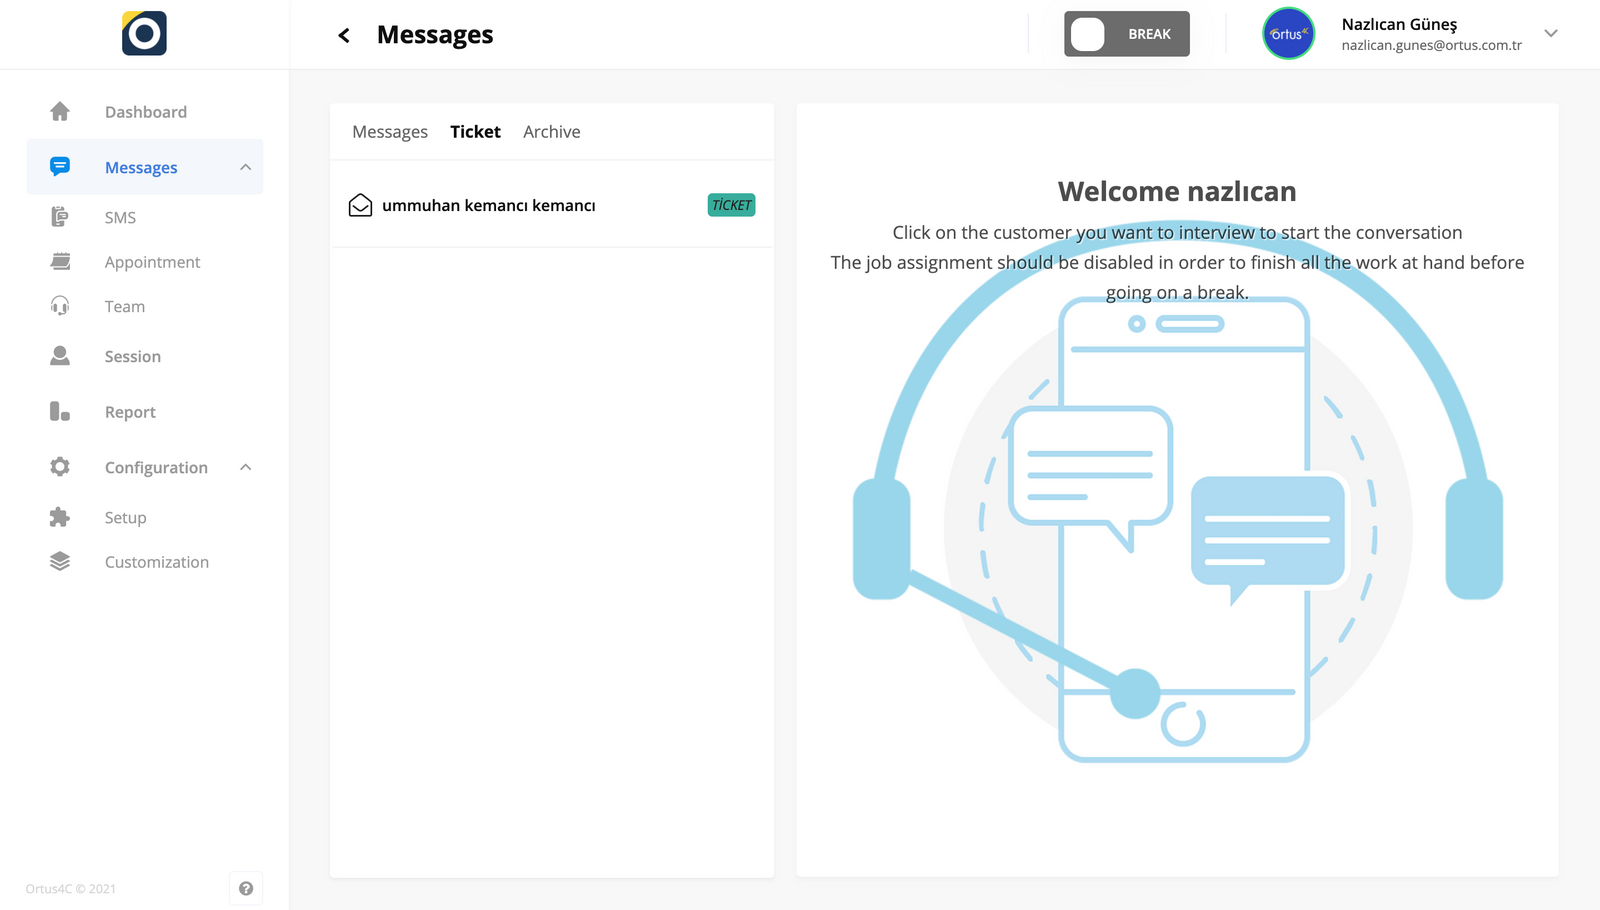
“Messages” in the “Handbook” section is the page on which customers and customer service representatives are messaging. You can view, archive and ticket your messages, including past messages, from the Messages tab at the bottom of the main page on the left menu of the page. You can read the article below for more information. ??

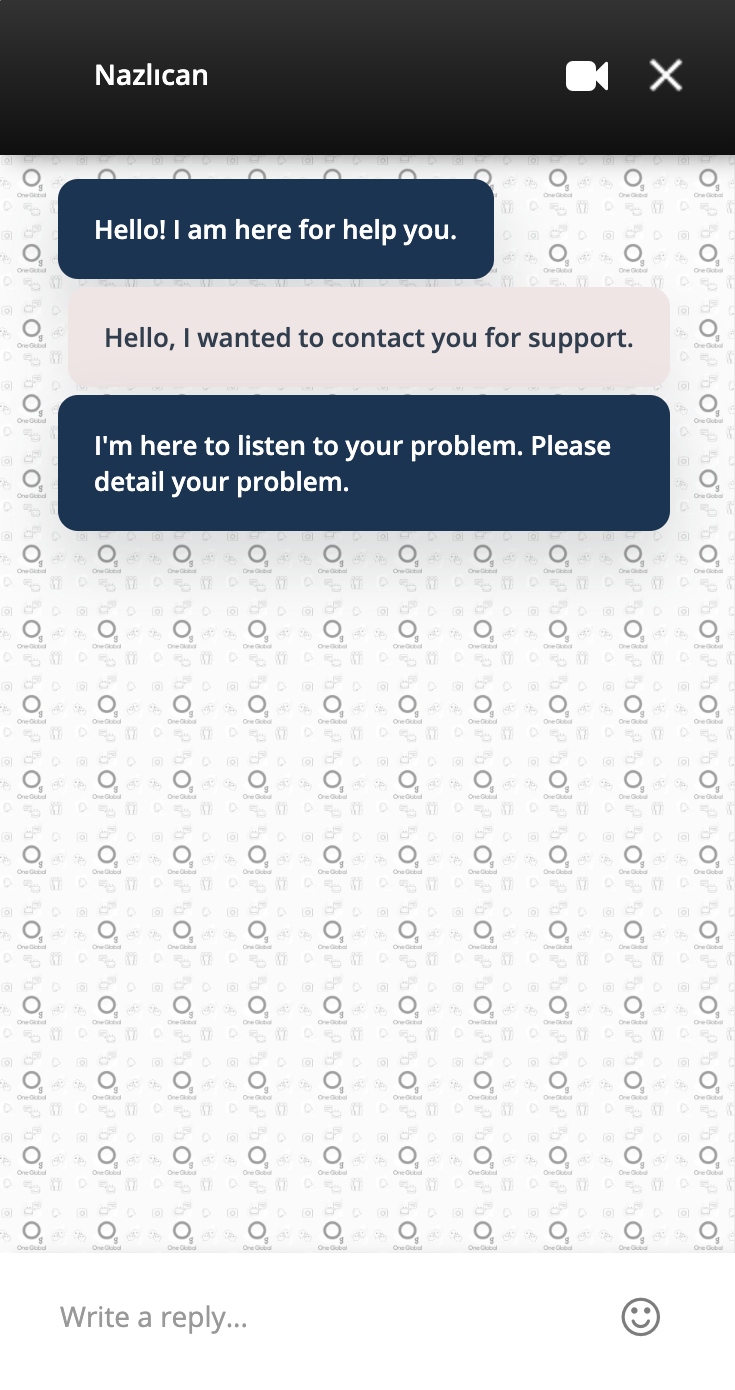
When your customers talk to operators, they talk on a screen like this and they see a screen like this. As you can see in the section that says Nazlıcan above, it is indicated to which operators the customers are assigned. All messages here fall into the messages section of the operators.

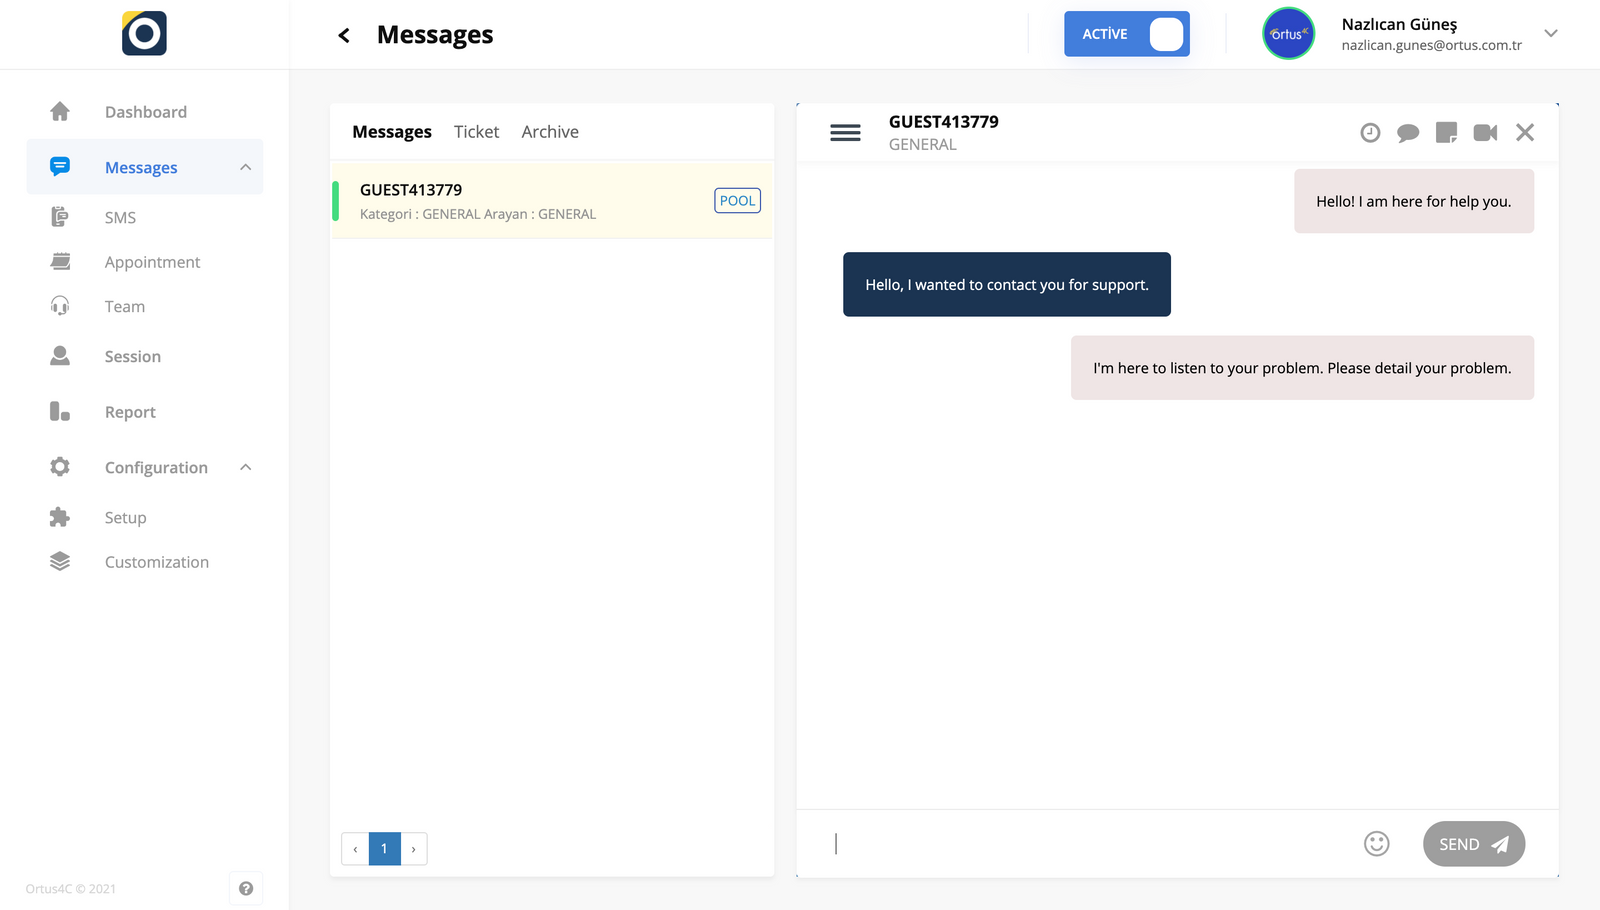
As you can see on the screen above, operators communicate with customers from here. We have made an example talk in order to set an example for you and to be able to make sense in your mind. Our ”Hello! I’m here for help you.” message is the messages we have determined automatically. You can also edit these messages from the Customizations section we wrote in our previous articles. Please don’t forget to check out our other articles too!

What is ticketing?

The operator takes the offline messages sent to the system outside of working hours by making a ticket. Thus, they communicate with the customer and do this via e-mail. It will be returned by mail.

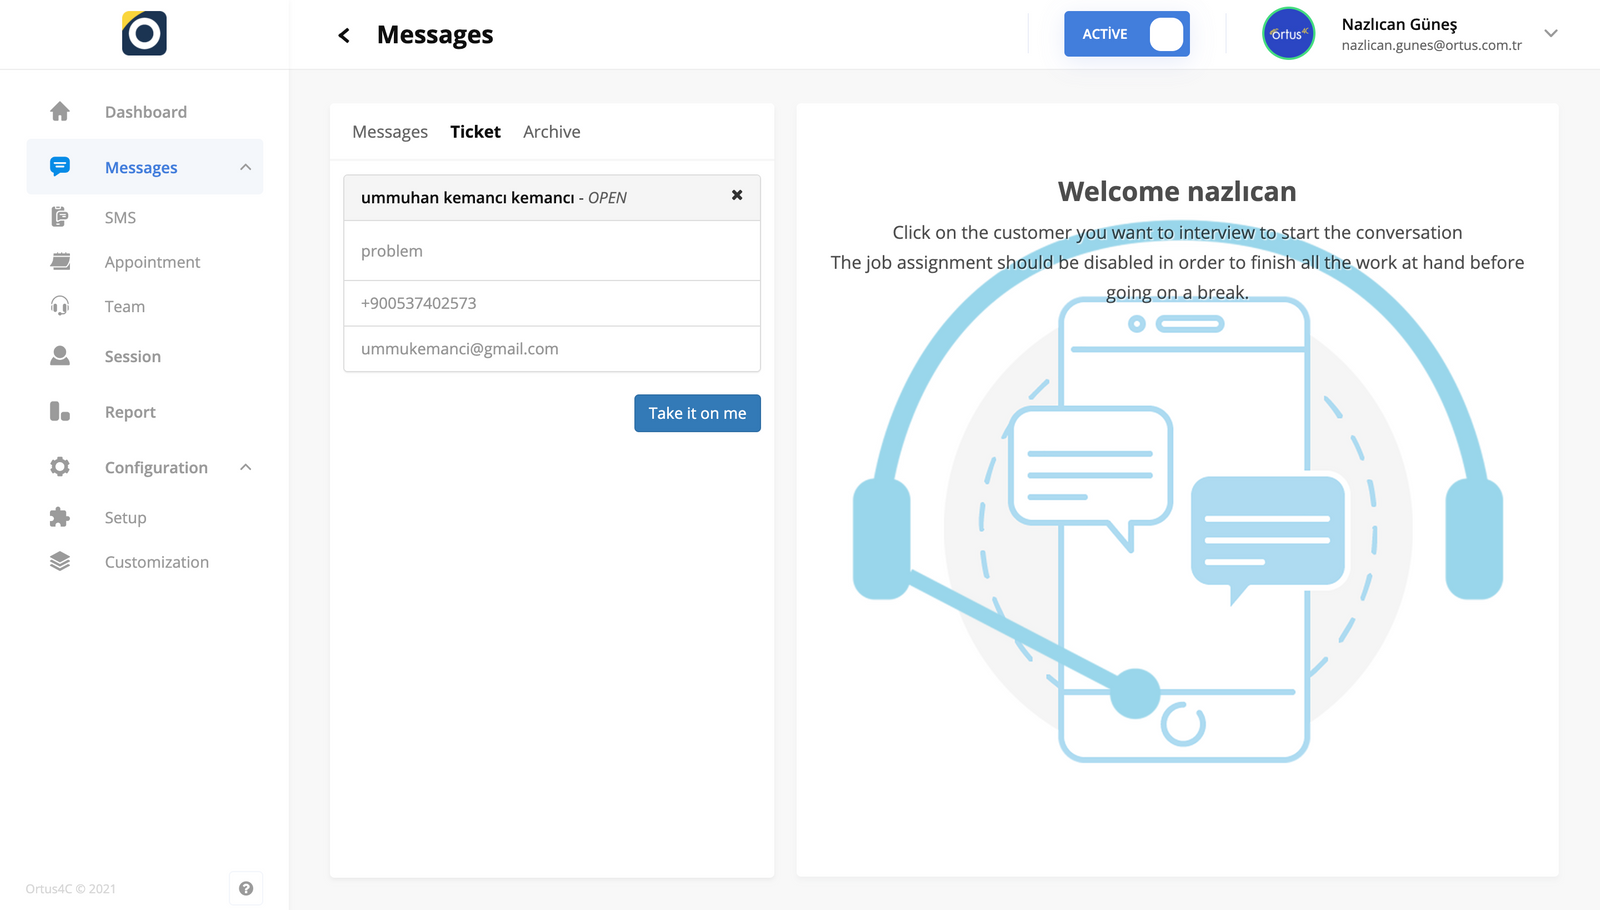
When you press the ticket button, you will be greeted with a screen like this. Don’t forget to activate your availability to make the ticketing process here.

Click on the operator on this screen to complete the ticket transaction. Let’s take the job of another operator friend to give you an example here. So let us show you this process step by step. The information here is entered automatically. After you click the ”take it on me button”, you take the job on yourself.

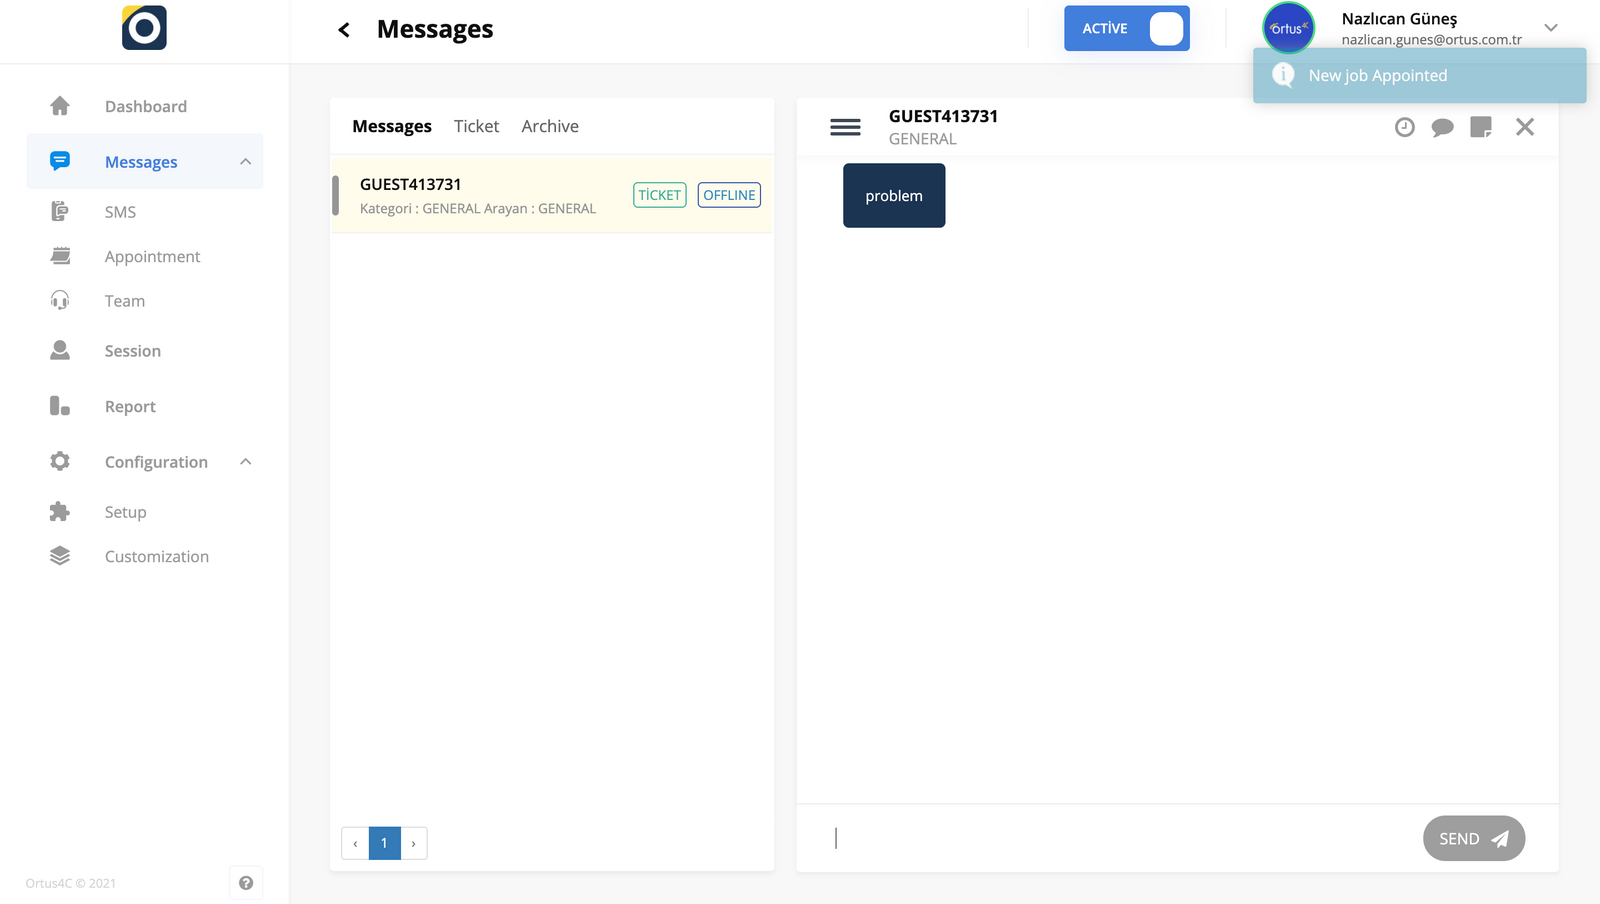
After making this operation, the customer falls into your pool and appears in your messages section. Here you can talk to the customer and make the service requested by the customer. You will also receive a notification stating, which is seen in the upper right corner of the page, that when these things fall into your messages.

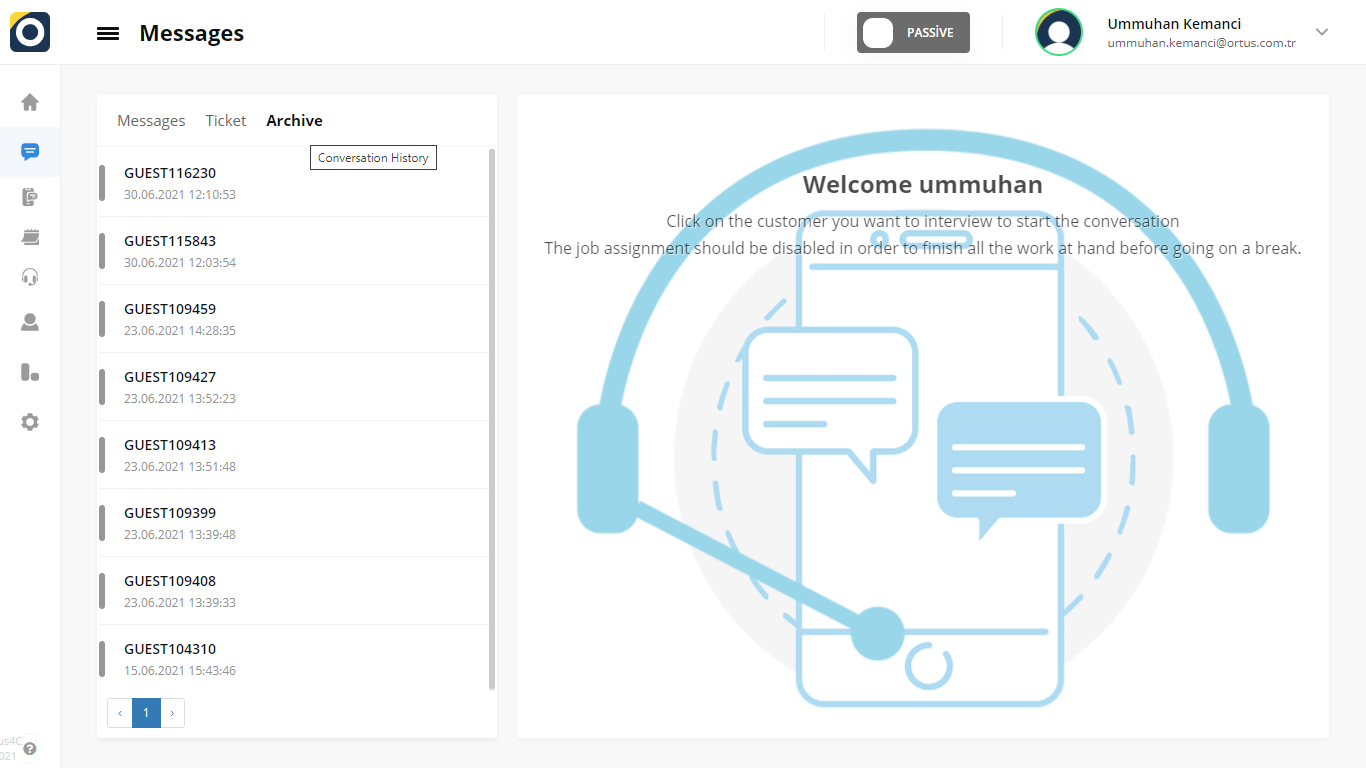
When the conversation ends, the operator closes the job. After this process, the closed message is moved to the archive section. Here you can hide your old messages. This archive part is visible on every operator’s page. Customer’s conversations appear here.

What is Pool Section?

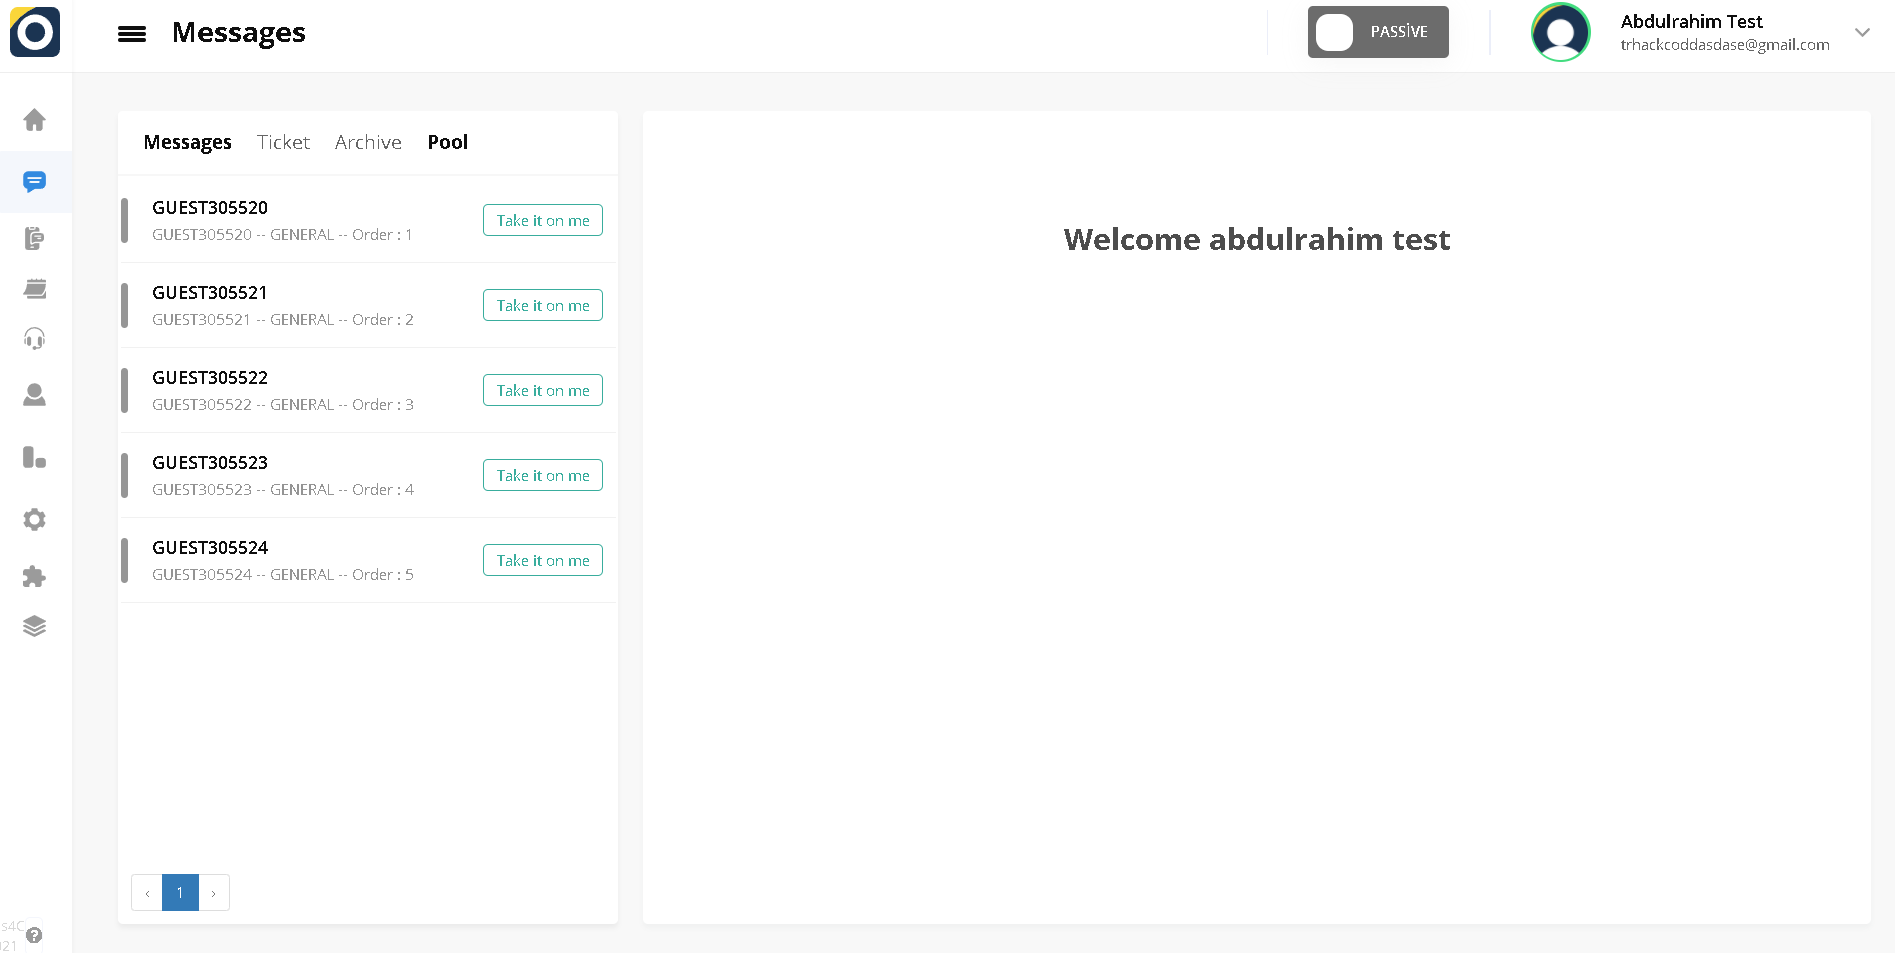
The accumulated customers must be gathered in one place. This section is called the Pool. You can assign the customer to yourself by selecting a customer you want in the Pool section and pressing the Take it on me button. The assigned customer will be in the Messages section.

That’s it!

Still need help? Message Us

SMS

“SMS” in the “Handbook” section is for sending sms to your customers. You can customize your message with the options on the screen during sms sending. Your customers can initiate a written and video conversation with the link in the message sent to their phone. You can read the article below for more information. ??

Select Channel

You can choose from which channel you want to send sms to your customer from the Select Channel section. You can also apply all these steps in the section that says subject and customer.

Subject

Subject is the short text that constitutes the content of the message (ex. password).

Customer

Customer determines the customer (ex. general or individual).

Message Template

As we have shown you before from the Message Template section, you can select the template related to the message template you will set from the settings section. The template you choose from here is the message template that will automatically go to your customer’s phone.

Phone Number

In order to send an SMS to your customer, you can enter the phone number of your customer in the Phone Number section.

Ticket ID

Ticket ID is the ticket number of the SMS sent.

E-Mail

You complete the step by entering contact information such as your customer’s name and e-mail in the Name and Mail section. Then when you click on the send message button, the sms will be sent.

You can also make any changes you want from the boxes under all contact information. Before sending the sms, you can make changes here and sms will be sent according to the changes you make.

Customer Can Choose

In the first button, the Customer Can Choose button, customers enter their own information. If you click this button and activate it, you don’t need to enter the contact information you will enter here. Customers enter their own information. So, you only have to command the message to be sent automatically.

Normal Assignment

If you activate the normal assignment button, customers who are normally assigned directly from the system are assigned to the operators differently this time. When you mark this button, customers are put in the pool and queued. so when it’s their turn and whichever operator is available for that moment, that operator talks to the customer.

Default Customer Type

This is where you can select your default customer type.

Direct Video Call

If you activate this button, the simultaneous video call will start when the sms is gone.

Primary Key, Secondary Key, Tertiary Key, Quaternary Key, Ext Reference Key

You can use these fields to get different information other than the information we have determined for the contact information of the customers. So you can make customizations as you wish.

ID No

The customer’s id number is entered here.

As you can see above, you can send sms to your customers by filling in the necessary information. In this way, your customers can use the link found in SMS when contacting you.

That’s it!

Still need help? Message Us

Minimum Requirements for Ortus4C

System requirements

  • Internet Connection – wired or wireless
  • (3G/4G/LTE)
  • Microphone and Speaker
  • Camera

Operating systems

  • MacOs X (MacOS 10.7 or advanced version)
  • Windows 10, 8.1, 8, 7
  • iOS 10.0 or advanced version
  • iPadOS 13 or advanced version
  • Android 6.0x or advanced version

Browsers

  • Mac: Chrome 30+ , Firefox 27+, Safari 7+
  • Windows: Chrome 30+ ,Firefox 27+
  • Linux: Chrome 30+ ,Firefox 27+

Hardware Requirements for PC

  • Processor: Dual Core 2Ghz or further (i3/i5/i7 or AMD equivalent)
  • Memory: 4GB

Bandwidth Requirements

https://www.speedtest.net You can check the speed of your connection.

1 to 1 Video Call

  • 2.4 Mbps (up/down) 720p HD for video
  • 5.0 Mbps (up/down) 1080p HD for video sending and receiving
  • 1.3 Mbps (up/down) for standard video calling

For video conferencing or other events per person, there must be a minimum upload speed of 2 Mbps.

Still need help? Message Us

Achievements & Awards

Achieved so far / Portfolio data

  • 40%+ cost saving through remote visual claim assessment / patientconsultancy
  • 55% automation in customer service
  • Insurance claim resolution decreased from 30 days to 5 minutes
  • Successful industry specific Chatbot implementations
  • Insurance Claim Specific Bot – 40% of client questions automated
  • HR Bot – 30% of employee questions automated
  • Technical Service visual service product implementation
  • Travel and exploration cost reduced by 45%

Awards

  • Kworks Covid-19 Express Pandemic  Reward
  • Inovalig -2019 Finalist Startup
  • Oracle – 1 of 2 Globally supported Startups
  • IDC CIO Award – 2019

Still need help? Message Us

Appointment

Appointment

“Appointment” in the “Customization” section is for customers to make an appointment with their customer service representative. The appointments tab, you can customize your appointments that you create with customers and other serving operators. With personalized appointments, you will use a better quality and accessible system. You can read the article below for more information ??

Will there be an appointment: Using this option, you can answer the question of whether the channel will have an appointment status. İf you turn off the appointment option, customers will not be able to make any appointments, and all other options will disappear.

Now let’s look at how this is allowed

Don’t forget to save the changes after you turn on get an appointment!

The appointment screen you have customized is for the Handbook> Appointment page. Click here for more information and access to the article.

Options

Appointment URL

You can type the appointment url text here.

Hostname

You can view the channel you are in here.

Start Time

Appointment start time.

End Time

Appointment finish time.

Working Hours

Opening hours for appointment.

Appointment Time Zone

Current time zone tab.

After Creation Service

The appointment is an indication of a third-party service to be called upon once established.

Split Time

Indicates that for each appointment created, the calendar can be broken into minute-by-minute pieces. The calendar is divided according to the allotted minutes.

Split Label Time

Indicates the number of minutes of the meeting determined by appointment.

Wiew Mode

Wiew mode consists of two modes: busy time and free time.

Busy Time

In Bussy time mode, the serving customer representative selects times when it is not available (Ex. meeting time). The customer can choose any time other than bussy hours entered by the customer representative, and the hours set as bussy time do not fall in front of the customer.

Free Time

The serving customer representative saves their free time to the calendar. Customers make an appointment by selecting one of the Free Times included in the calendar. During the appointment process, the customer can only see and select the specified free time, not an external time.

Free Time Service:

The customer representative does not need to manually enter their free time only through the ortusdesk channel. The user company can automatically receive the customer representative’s free time with its own service.

Customizing the appointment section is entirely in your hands. The appointment screen that you personalize will be available to other operators.

That’s it!

Still need help? Message Us

Tool

Tool

“Tool” in the “Customization” section is the general view setting used by users. Here you can change the overview settings of your support page and chat bot. The changes you make here will be seen by your customers and other opertors. your support page, where you have free personalization, will be shaped according to the settings you make. You can edit your theme color, logo, and more on this screen. You can read the article below for more information??

Tool

Choose your pre-live support page: Your pre live support page is for you to decide which page will appear when you switch to live support (Ex. index or blog)

If you choose the blog title, a page will open in this way.

Customize blog url

Here you can enter the blog url of your customer support page.

Customize blog logo url

Here you can enter the blog logo url of your customer support page.

Pre-live Support Window

Enter Your Tool Name

Here is the name of your platform where you will meet your customers. The name of this platform is also displayed by customers.

Upload Your Tool Logo

Here, you can upload your platform’s logo.

Choose a Color Theme

From here, you can set the color theme of your platform and make adjustments as you wish.

Enter Your Title

The title you will write here is determined as the name of the platform where you will meet with your customers. The name of this platform is also displayed by customers.

Enter Your Description

Here you can enter a short description for your page.

Choose the Parametres you want to recelve from your customers

You can get the information you want from your customers with the parameters you set here. At the same time, you can add ”the text of the user data protection law” to your platform from the button just below these parameters. When this button is activated, a space is created for you to put this text. You can adjust this selection in the desired direction and remove it completely if you want.

You can select a box with parameters to receive feedback from your customers. You can adjust this selection in the desired direction and remove it completely if you want. Before starting the conversation according to the paremeters you have selected, questions will appear in the chat window that opens according to your choice.

İf you turn off the option to receive paremeters, you allow them to connect to you without receiving any information from your customers.

The information you enter here will take shape just like the example shown on the right. This is what your platform will look like to your customers.

Choose the content and color of your live chat start button

Here, you can customize the content and color of your live chat start button.

Enter your footer title

You can create and edit a title for your platform’s service by entering your footer title. You can also view how your customers will see this title when you scroll down in the photo example shown on the right.

Enter footer URL

This section is for the url of your footer header that you created. please enter your existing url address here.

Upload your online icon

The icon you will upload here is an icon that will be used and displayed while online.

Upload your offline icon

The icon you will upload here is an icon that will be used and displayed while offline.

Enter the width and height of your icon

From here, you can make customizations and edits by adjusting the height and width of the icon you have uploaded.

Live Chat Window

Enter your welcome message

The message template you specify here will be a welcome message. Thus, when your customer enters your page and wants to get support, this will be the first message they will see.

Choose your team’s chat bubbles

Here you can set the text and background colors. You can also define and edit these features specifically for your chatbot, customer and team.

Choose your customers chat bubbles color

Here you can set the colors of chat bubbles. Chat bubbles are the area where messages are transmitted during a conversation. You can define and edit these features specifically for your chatbot, client and team.

Select chatbot buttons

Here you can choose the colors of Chatbot buttons.The chatbot button includes the message sending Button and the file sending button.

Redirect your customers to the pre-live chat window after ending the call?

This option is the status of the live support window in front of your customer after you have finished your search. You can turn it on or off.

Upload exit icon

Here is the icon of your chatbot seen by your client.

Notification

Notification balloons background color

Here you can decide the background color of notification balloons. The color you decide is what will appear when the chat notification falls on your screen.

Live chat queue

The message template you specify here will be shown to customers who want live support but are in line.

Live chat queue limit (Customer limit in Pool)

Here you set the limit of the live chat queue. Customers queuing for live support are adding to the pool. That means you set the limit of the customers in the pool, you can edits as you wish.

Operator connected to call

A message template is prepared here to notify the connecting operator while the customer is waiting. The message template you will prepare here will appear on the screen when the operator arrives while the customer is waiting for the operator.

Call end message

Your call has been terminated by the operator. Enter a short message here so that your customer can see this situation.

Missed Message notification

To report the status of messages that have not been received by your customers. Enter a short message so that your customer can see this situation.

Conversation recording notification

You can create a template here and use it to inform your customers that you have recorded the conversations. You can also make edits.

Customer Timeout

You can create a template here to notify your customer when they don’t respond for a long time and time out. You can also edit this template as you wish.

Rating History

Select interview evaluation topic

Determine the subject of evaluating your client’s speech (ex. good or bad).

Enter your interview review title

Before you evaluate your customer’s conversation, you can enter an introduction title here and thank your customers if you wish.

Enter your interview rating description

You can enter a description here with a template that you specify that you want your customer to evaluate your conversation.

Enter your interview rating thank you message

You can also specify a ”thank you” message to customers for conversation’s evaluation here.

Offline form

Will there be an offline message form

This question is for when operators want to reach customers when they are offline. you can report this situation with the content you enter here.

Enter your offline message description

Here’s a draft of offline messages to be shown to inform customers who arrive outside of working hours and also you can make edits.

Example Message

Hello, unfortunately, our team can’t help you because our working hours are over now. Can you fill out the form below so we can get back to you as soon as possible?

If you disable this option, your customers will not be able to see when operators are offline.

Other

Enter caller field name

Here you can determine which customers want to contact you, and you can name and edit the name of this category.
Enter category field name

Enter your customers ‘ categories here. For example, an individual customer or a corporate customer. Setting this category will provide convenience for you.

That’s it!

Still need help? Message Us